Create and Manage Scenarios
You can create as many scenarios as you need within a project to represent different combinations of land use alternatives and analysis assumptions.
For information on land use scenario development, see Build Land Use Scenarios. For information on varying analysis parameters for scenarios, see Setting Analysis Parameters.
Scenario Management Features
You can access scenarios and their basic management features via the tabs that extend across the top of the user interface in Explore, Build, or Analyze modes.
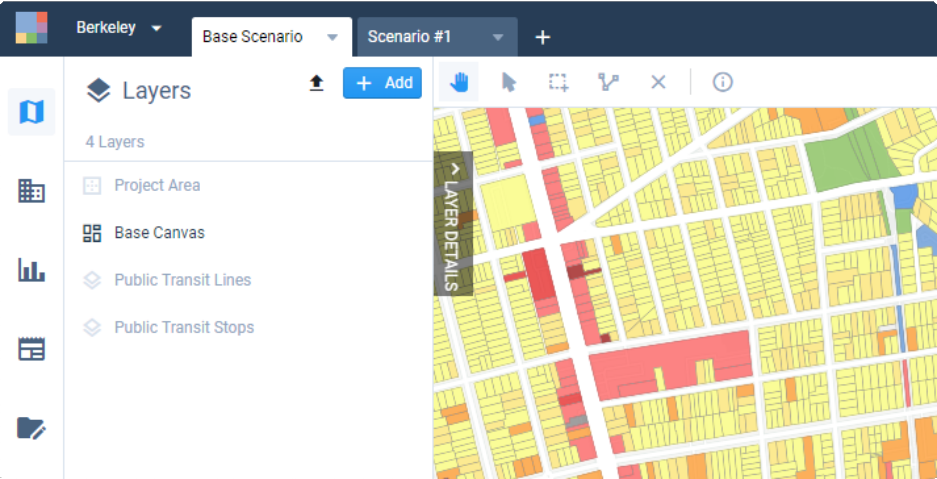 |
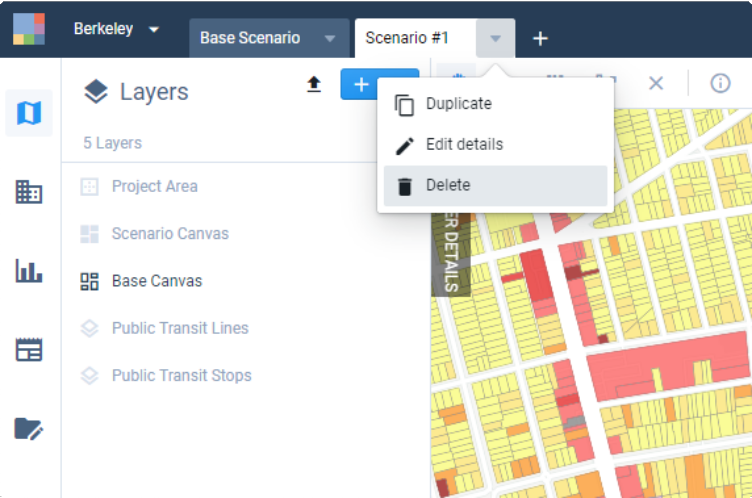
View of scenario tabs along the top of the user interface
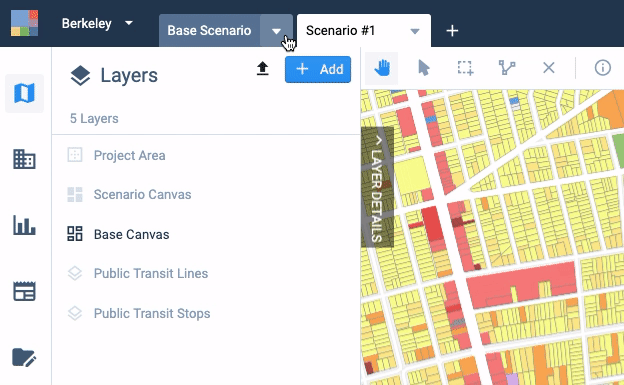
When you create a project, a Base Scenario is automatically created. The Base Scenario includes the Base Canvas only and represents existing conditions. New scenarios are created as copies of the Base Scenario, or other scenarios that have already been created. New scenarios contain the Base Canvas as a reference layer, and a Scenario Canvas layer that corresponds to the selected scenario.
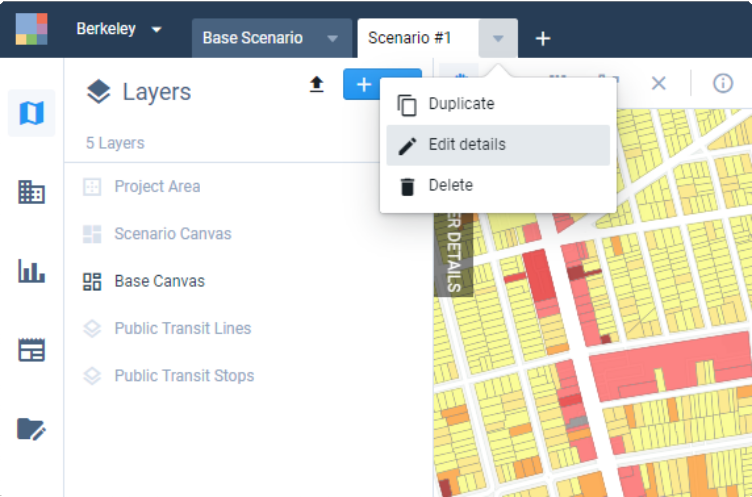
Scenario Management Options – Each scenario is accessed by a tab, from which you can access a menu of scenario management options. Options vary for the Base Scenario and other scenarios.
Create scenario (Base Scenario only) – Creates a new scenario with the Base Canvas as the starting point for the Scenario Canvas.
Duplicate – Creates a new scenario as a copy of the selected scenario. Not applicable for the Base Scenario.
Edit Details – Allows you to edit the scenario name and description. Not applicable for the Base Scenario, for which the name is fixed.
Delete – Deletes the scenario. Not applicable for the Base Scenario, which cannot be deleted.
Create a new scenario
 – Located to the right of the scenario tabs, selecting this icon opens a menu from which you can select the Base Scenario or another existing scenario as the basis for a new scenario.
Reordering scenarios – Scenario tabs can be reordered. To do so, click and drag the tabs.
Create a Scenario
You can create scenarios anew from the Base Canvas, or as duplicates of existing scenarios. To create a scenario:
Click the
icon to the right of the scenario tabs and select the Base Scenario or any existing scenario as the basis for your new scenario. Your new scenario will be created. A tab for your new scenario will appear when finished. A confirmation message will also appear at the bottom of your screen. 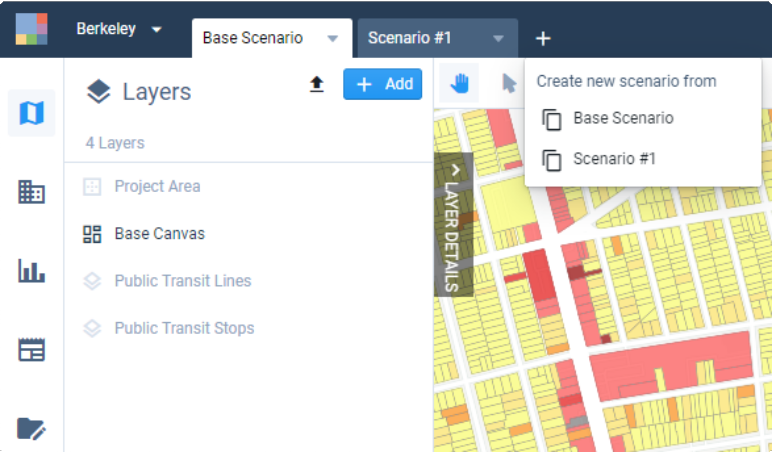
Alternatively, click to expand the menu for either the Base Scenario tab or the tab of the existing scenario you would like to copy. The menu options appear.
Select Create scenario (if creating a scenario from the Base Canvas) or Duplicate (if creating a scenario as a copy). Your new scenario will be created. A tab for your new scenario will appear when finished. A confirmation message will also appear at the bottom of your screen.
Whether created as a clone of the Base Canvas or as a duplicate of an existing scenario, your new scenario will maintain all the data layers of the original scenario, with the exception of any analysis output layers. Analysis output layers are generated the first time you run a module for a scenario.
Rename or Add a Description to a Scenario
To rename or add a description to your scenario, select Edit details from the scenario tab menu. A window appears where you can edit the scenario name and add a description.
 |
Delete a Scenario
To delete a scenario, select Delete from the scenario tab menu. A confirmation dialog will appear. If you select delete, the scenario will be permanently deleted.
 |
Note
Deleted scenarios cannot be recovered, so proceed with caution.