Gridding Features in the Base Canvas
Feature gridding allows you to split existing features into multiple grid cells to model master plans or otherwise depict development on large sites. "Gridding" replaces an existing feature with a number of new, smaller features that can be painted with different land use types. Controls allow you to adjust the size, rotation, and position of new gridded features to align with plans and their orientation within sites.
Feature gridding supports more refined scenario developments using existing Base Canvas features.
Feature gridding may most apply to:
Modeling mixed-use or Master Plan developments on more minor scales within a city block or across a corridor.
Projects that handle an area of 100+ acres but only contain 2-5 parcels. Gridding offers the option to represent the plan without requiring feature replacement.
 |
Master Plan/Infill
 |
Greenfield/AG Land
Note
Feature gridding is applicable for projects created on or after May 1, 2020. Unfortunately, it cannot be applied in older projects. To enable feature gridding, we recommend that you create a new project.
Base Canvas Feature Gridding Controls
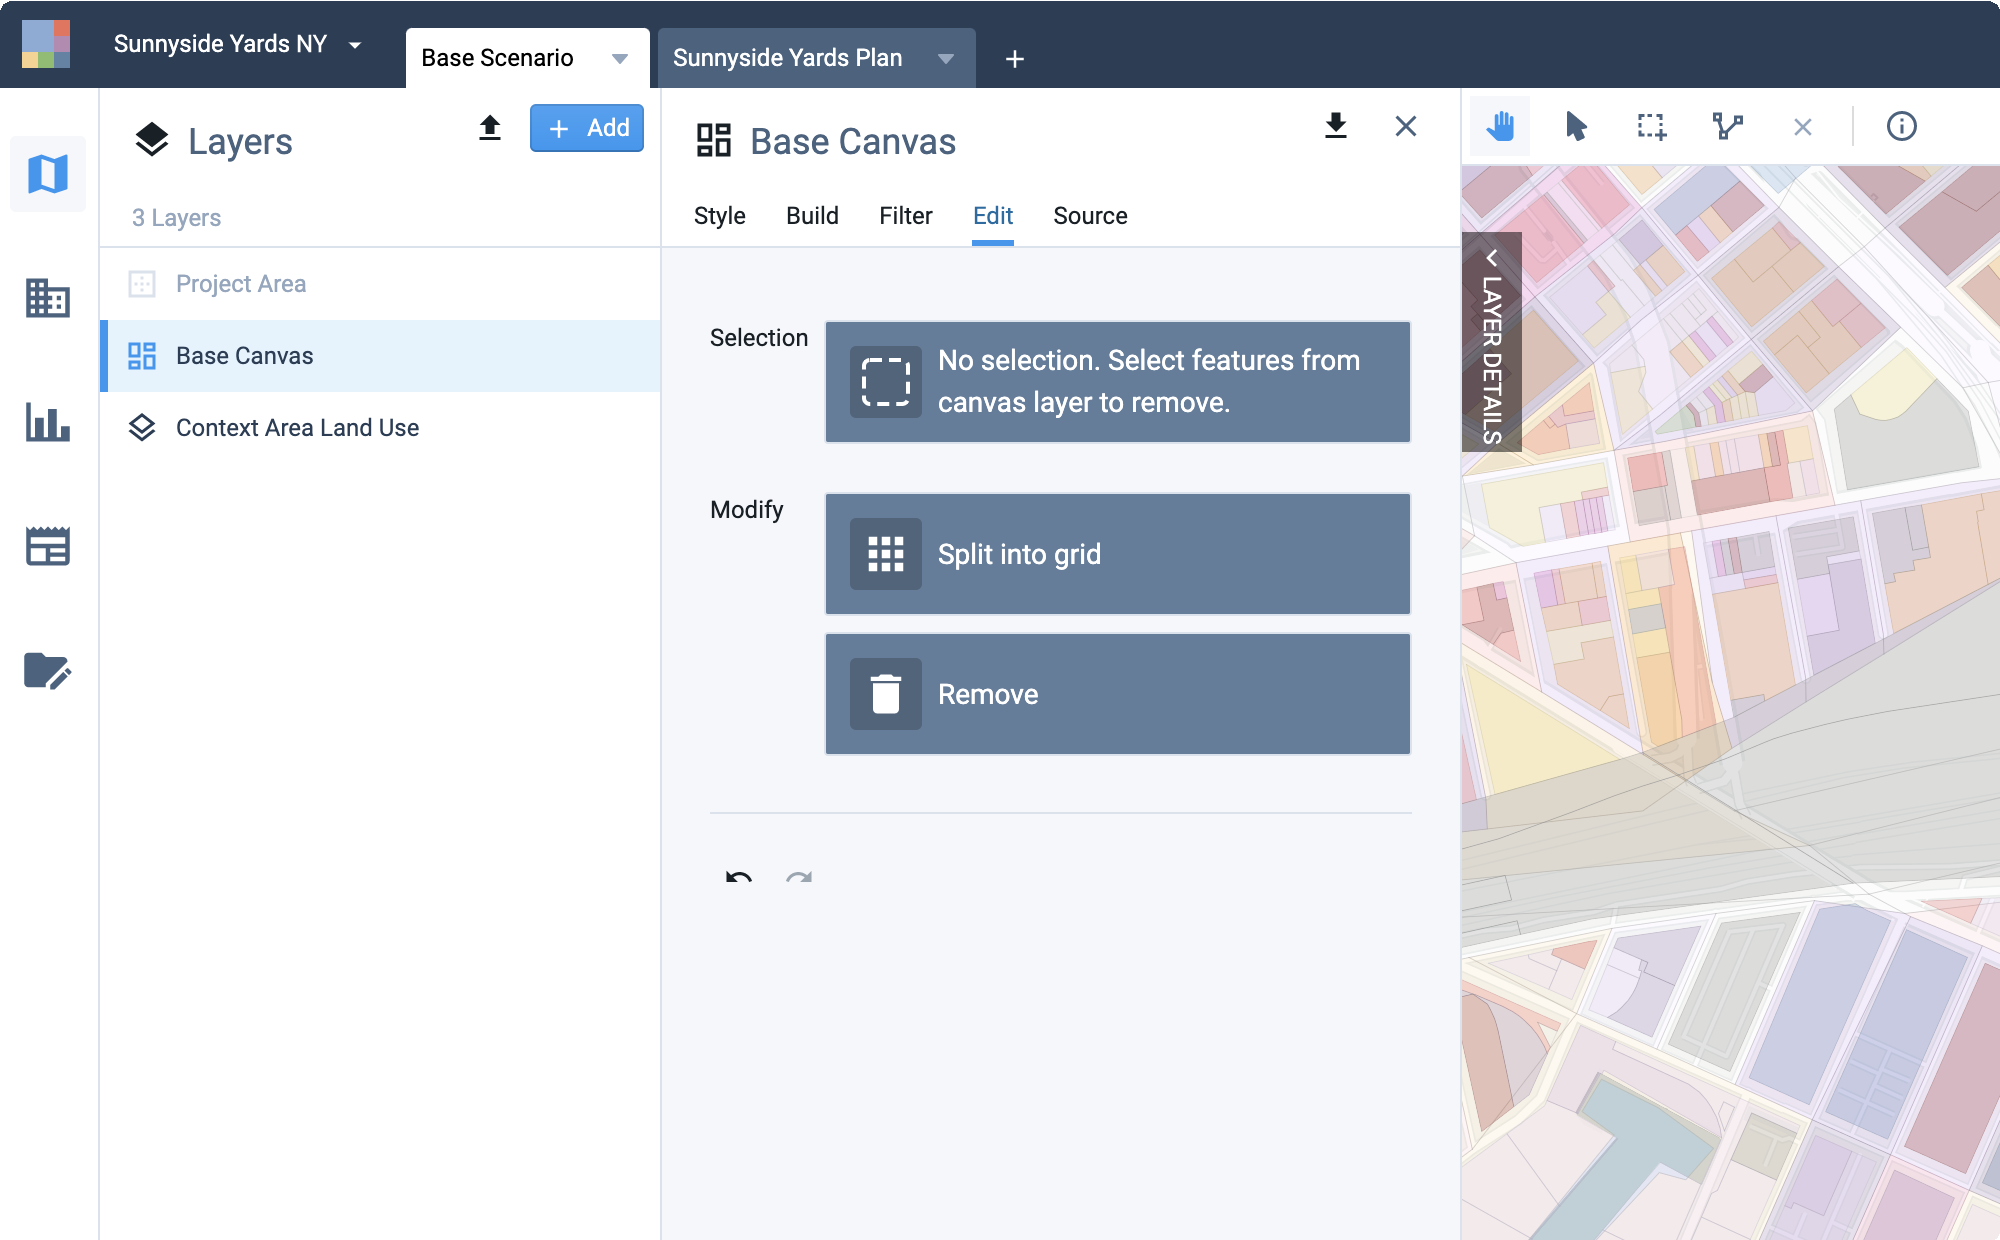
The controls used to split features into grids are located on the Edit tab of the Layer Details pane for the Base Canvas layer. From the Edit tab, you can also remove features.
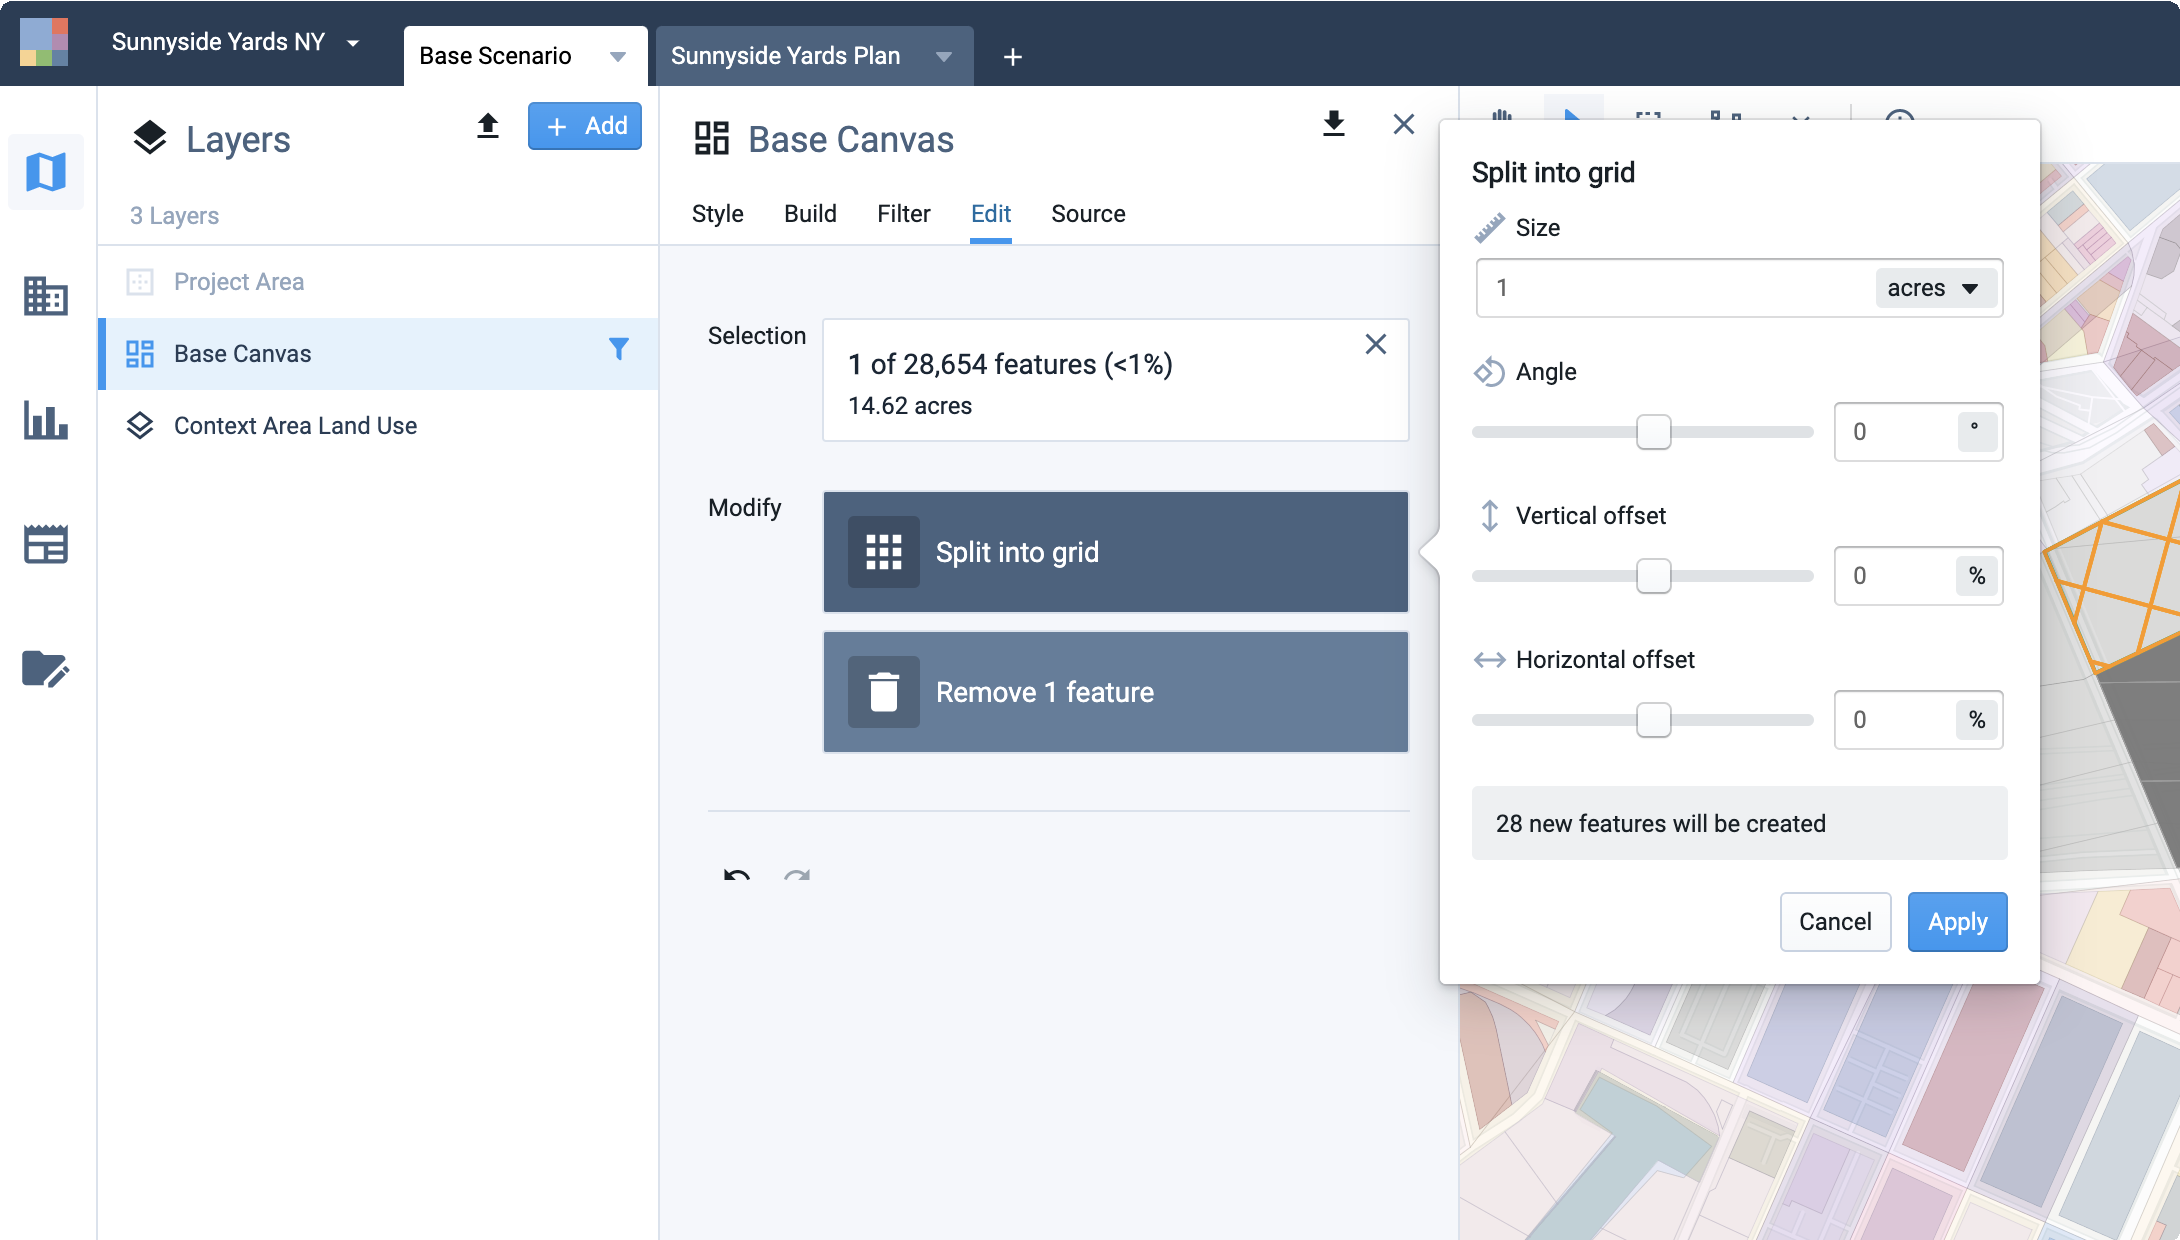 |
Feature gridding controls located on the Base Canvas Edit tab
The controls include:
Selection – Summarizes the currently selected canvas features. The first line includes a count of the features selected, along with the count of features in the entire project area canvas. The second line indicates the total area within the selected features.
Modify – Includes the Split into grid control. Clicking the button opens the Split into grid window, where you can specify the size and orientation of the grid layout. As you change settings, the map view updates dynamically to show a preview of the grid layout within the selected feature. Settings include:
Size – Numeric entry for either the grid cell area, or the length of a grid cell edge. The dropdown list lets you select a unit of area or length.
Angle – Slide-bar control or numeric entry, in degrees, for specifying the rotation of the grid.
Vertical offset – Slide-bar control or numeric entry, in percent of grid cell edge length, for specifying the vertical positioning of the grid.
Horizontal offset – Slide-bar control or numeric entry, in percent of grid cell edge length, for specifying the horizontal positioning of the grid.
Count – Indicator of the number of new grid-cell features that will be created. You can split a single feature into as many as 500 new features.
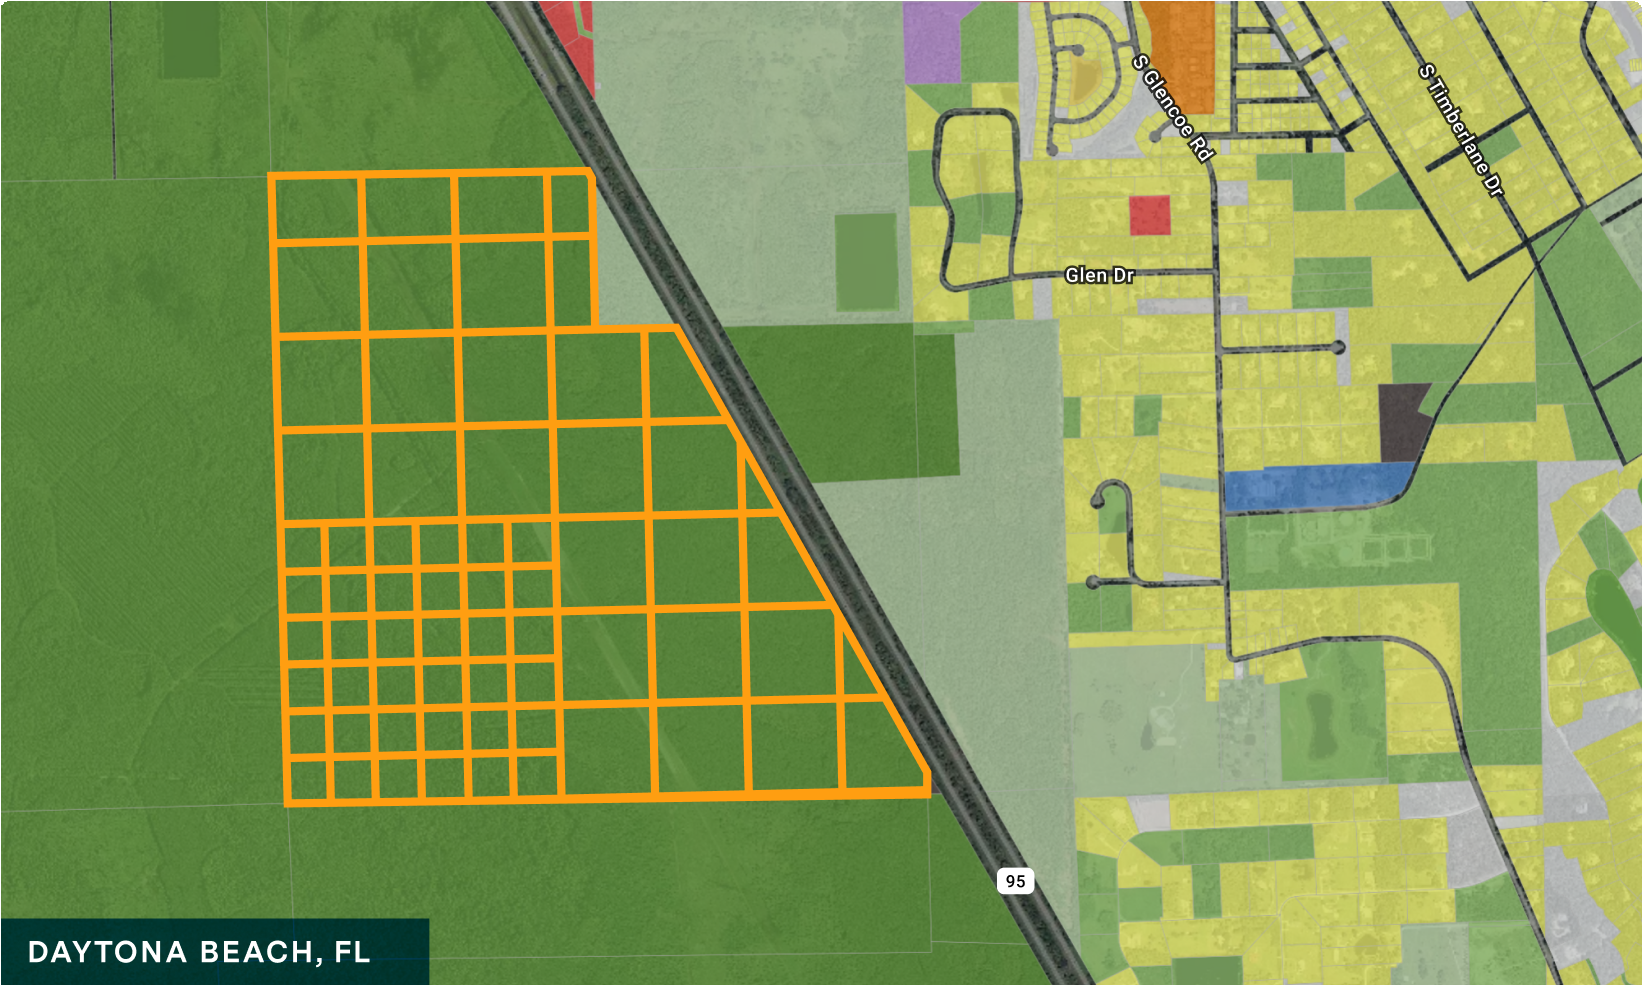
Feature gridding can be used flexibly to suit your planning purposes. You can use the grid layout to approximate the spatial configuration of a plan. Or, you can create grid cells of a set size—for example, one acre—in order to represent a plan programmatically by type. You can also use the gridding feature to simply split a feature into two or more large parts. The examples below illustrate some potential applications.
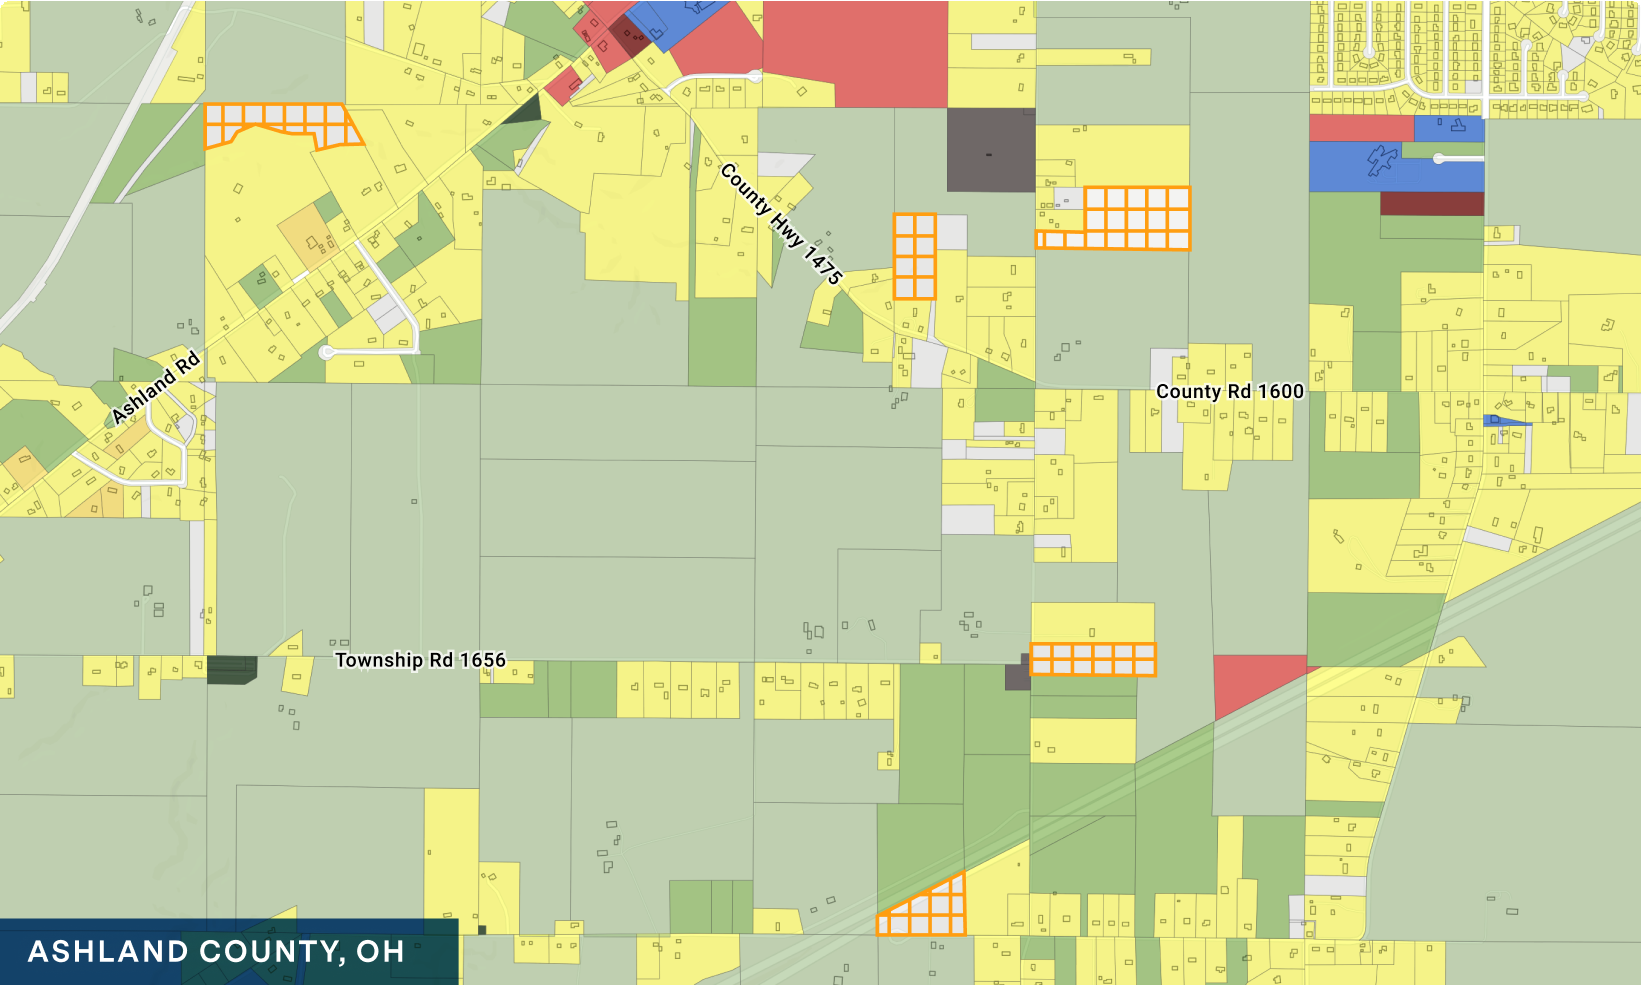 |
Gridding vacant parcels into one-acre cells in Ashland County, OH
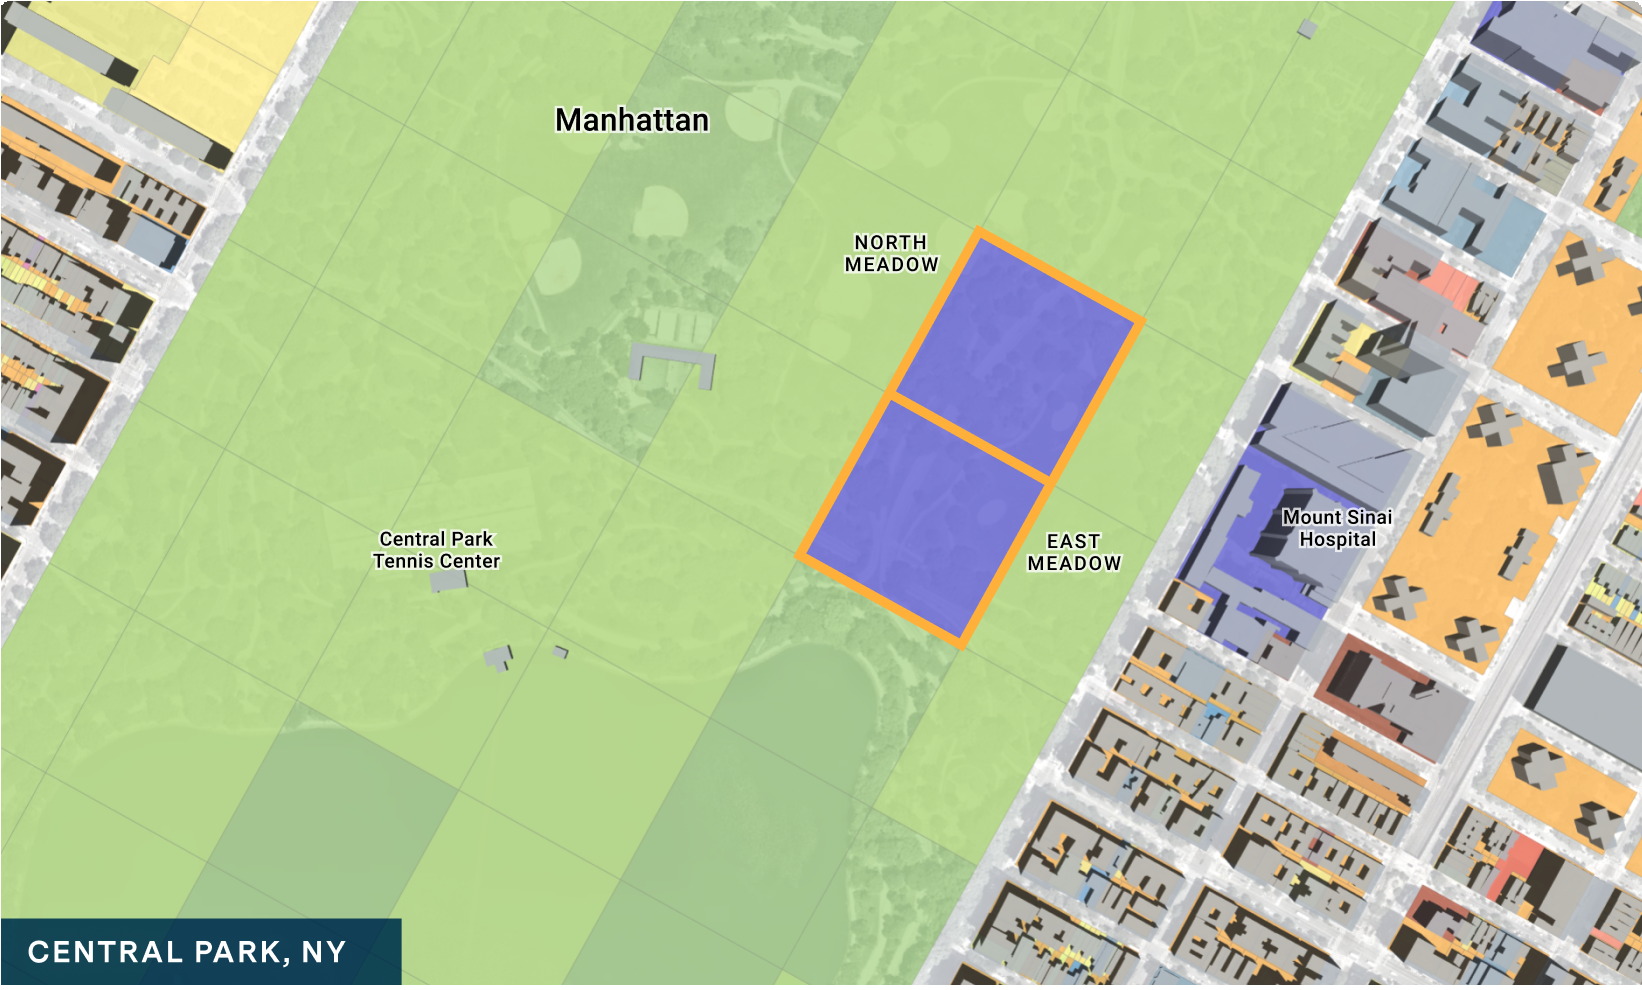 |
Quickly modeling a field hospital in Central Park, NY
When a feature is split into grids, each new feature retains the land use classifications of the original feature. To preserve base scenario control totals, the original values for population, households, dwelling units, jobs, and building and land area attributes are apportioned to the new features according to their share of the land area of the original feature.
For example, if a parcel containing two dwelling units is split into two smaller features occupying 60 and 40 percent of the original parcel area, the resulting features will contain 1.2 units and 0.8 units, respectively. To distribute the existing development values more realistically, you can reclassify the new features.
Gridded features can be set up to represent either net or gross land area. If using grid cells to depict net land area within a site that will include rights-of-way, you could represent plans by painting some grid cells as developable parcel areas using Building Types, and others as rights-of-way. While you may not be able to use the gridding controls to explicitly depict right-of-way areas between parcels, you can paint grid cells programmatically to represent the amount of land dedicated to streets and sidewalks. (The particular location of features designated as right-of-way areas using Building Types or Place Types will not affect transportation and accessibility analysis since they will not be recognized as functional street networks.)
Alternatively, you can set up gridded features to represent gross land area and distribute right-of-way area among them. In this case, you would paint them using Place Types that incorporate assumptions for right-of-way area:
Remove – Removes the selected feature(s). For more information, see Remove Parcels or Blocks from the Base Canvas.
Undo/redo arrows – Click to undo or redo your last feature gridding, feature removal, or reclassification action. Note that your last action may have been applied to a selection of features that is no longer current. Your past sequence of actions is retained across sessions.
It is possible to undo or redo a gridding operation after having painted the resulting new features in a scenario. If you do so, be sure to check how the features are affected in your scenarios. Paints applied to any gridded features may be extended to the entirety of the original feature if a gridding operation is reversed. If this is not intended, you can re-paint features or revert them to their base condition.
Learn to Grid Features
Select the Base Scenario.
Select the Edit tab in the Layer Details pane. The Edit tab of the Layer Details pane contains the feature gridding controls. From here, you can also remove features.
Feature gridding controls located on the Base Canvas Edit tab
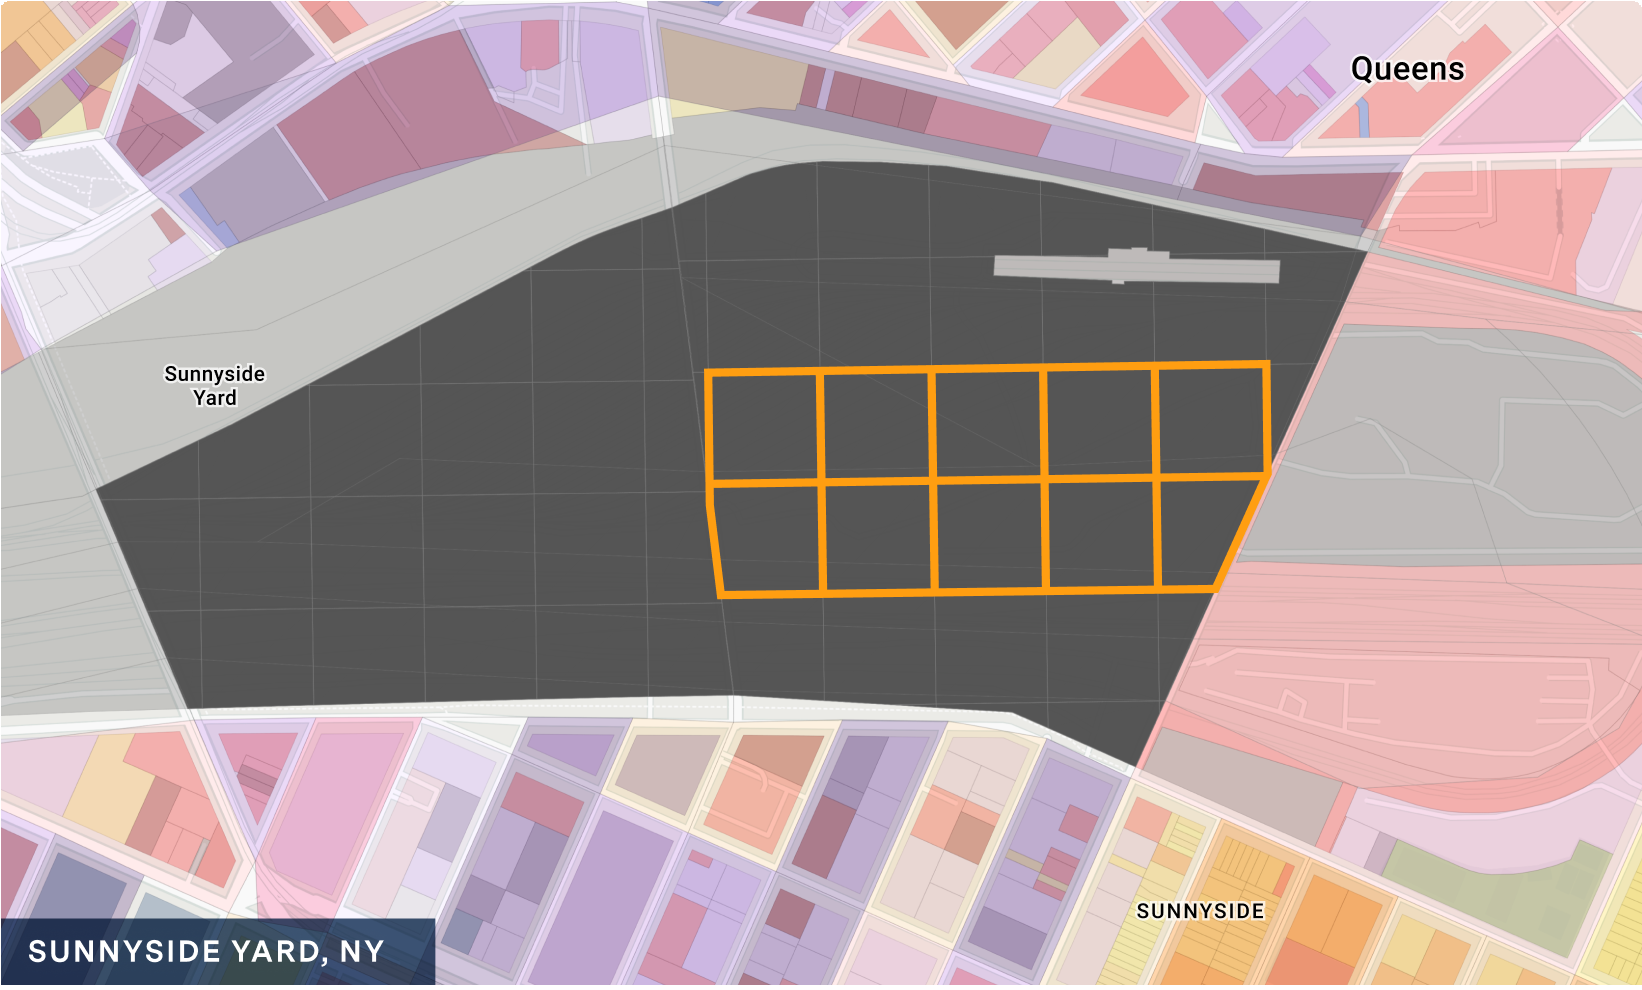
Use the manual selection tools to select features on the Base Canvas to be split. You can work on one or more features at a time. The Selection control will indicate the number of features you have selected and their combined gross land area in acres. For this example, we will select two parcels within Sunnyside Yard in Queens, NY.
Selecting two parcels on the Base Canvas to be split
Click Split into grid. The Split into grid window will appear.
Previewing the grid layout
Enter a grid cell size. Use the dropdown list to select a unit of area or edge length, then enter a value. You can see a preview of the grid within the selected feature(s). The resulting count of new features will be shown at the bottom of the window.
Setting a grid cell size
You can split features into a maximum of 500 new features at a time; a warning will appear if your grid cell specifications would result in too many new features. To create more features of a smaller size, try gridding one feature at a time. If you're already working with a single feature, note you can perform successive gridding operations: first, split your parcel or block into two or more large features by using a large grid cell size; then, split the resulting features into smaller grid cells.
Adjust the angle of the grid. Use the slider control or enter a value in degrees—negative values rotate the grid to the left, positive values to the right. Use the preview to set the grid angle as desired.

Adjusting the angle of the grid layout
Adjust the horizontal and vertical offsets. The offsets shift the entire grid layout horizontally and vertically. Use the slider controls, or enter values in terms of the percentage of the grid cell edge length.
Using the horizontal and vertical offsets
Click Apply to grid the feature into cells as shown. The original feature will be split out into new features. The new features will register on the map and show up in the data table.

Applying the grid layout
Each new feature will retain the land use classifications of the original feature, with population, households, dwelling units, jobs, and building attribute values distributed among the new features in proportion to their land area.
When complete, the effects of gridding features will be reflected in summary charts for the Base Canvas and any scenarios. If you split a feature that had previously been painted in a scenario, the feature will be replaced with the new gridded features as depicted in the base, with painting maintained.
Gridding features also renders any prior analysis runs as out of date. You will need to re-run analysis afterwards. The status as to whether results are current or outdated is indicated for each module in Analyze and Report modes.
Continue gridding features as needed. Newly gridded features can themselves be gridded into smaller features. As you work with the gridding controls you'll see that you can get creative in splitting up features to depict plans.
Use the Undo
 or Redo
  controls to make sequential changes, if needed. Undo and redo apply to your sequence of past feature gridding, feature removal, and painting actions, independent of the features that are currently selected.
Note that you can identify what features have been previously gridded using the "modification flag" column in the canvas called Modified; Gridded. The value is set to "Yes" or "No" depending on whether an individual features has been gridded. For more about the modification flags, see Base Canvas Modification Flags.
You may choose to undo a gridding operation so you can change the grid layout, or otherwise restore the original feature geometry. If you do so after having painted any new gridded features, be sure to check how the features are affected in your scenarios. Paints applied to any gridded features may be extended to the entirety of the original feature if a gridding operation is reversed. If this is not intended, you can re-paint features or revert them to their base condition.
Edit the new gridded features in the Base Canvas, if needed. The gridding operation distributes existing population, households, jobs, and development among the new gridded features to maintain the totals from the original feature. You can use the Base Canvas editing controls to make any desired adjustments to the land use designations and/or development characteristics of the new features as depicted in the Base Canvas.
Paint the new gridded features in your scenarios to represent plans. You can now paint newly gridded features like any other in the canvas. A painted depiction of the Sunnyside Yard Master Plan is shown below.
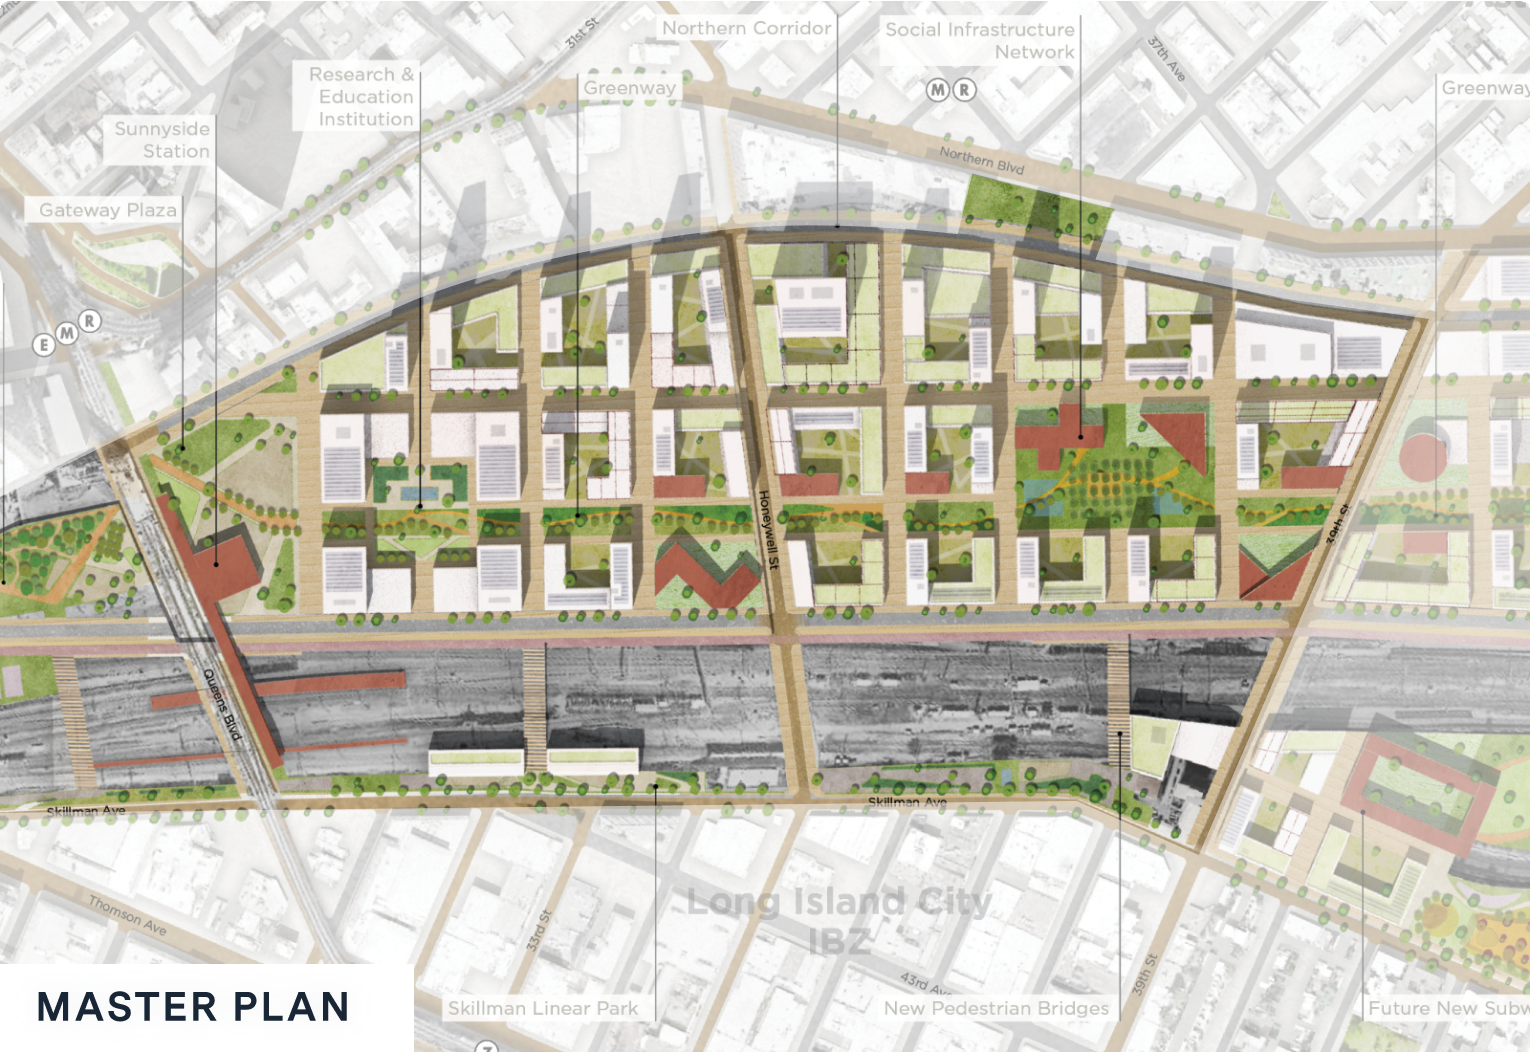
Illustrative from Sunnyside Yard Master Plan
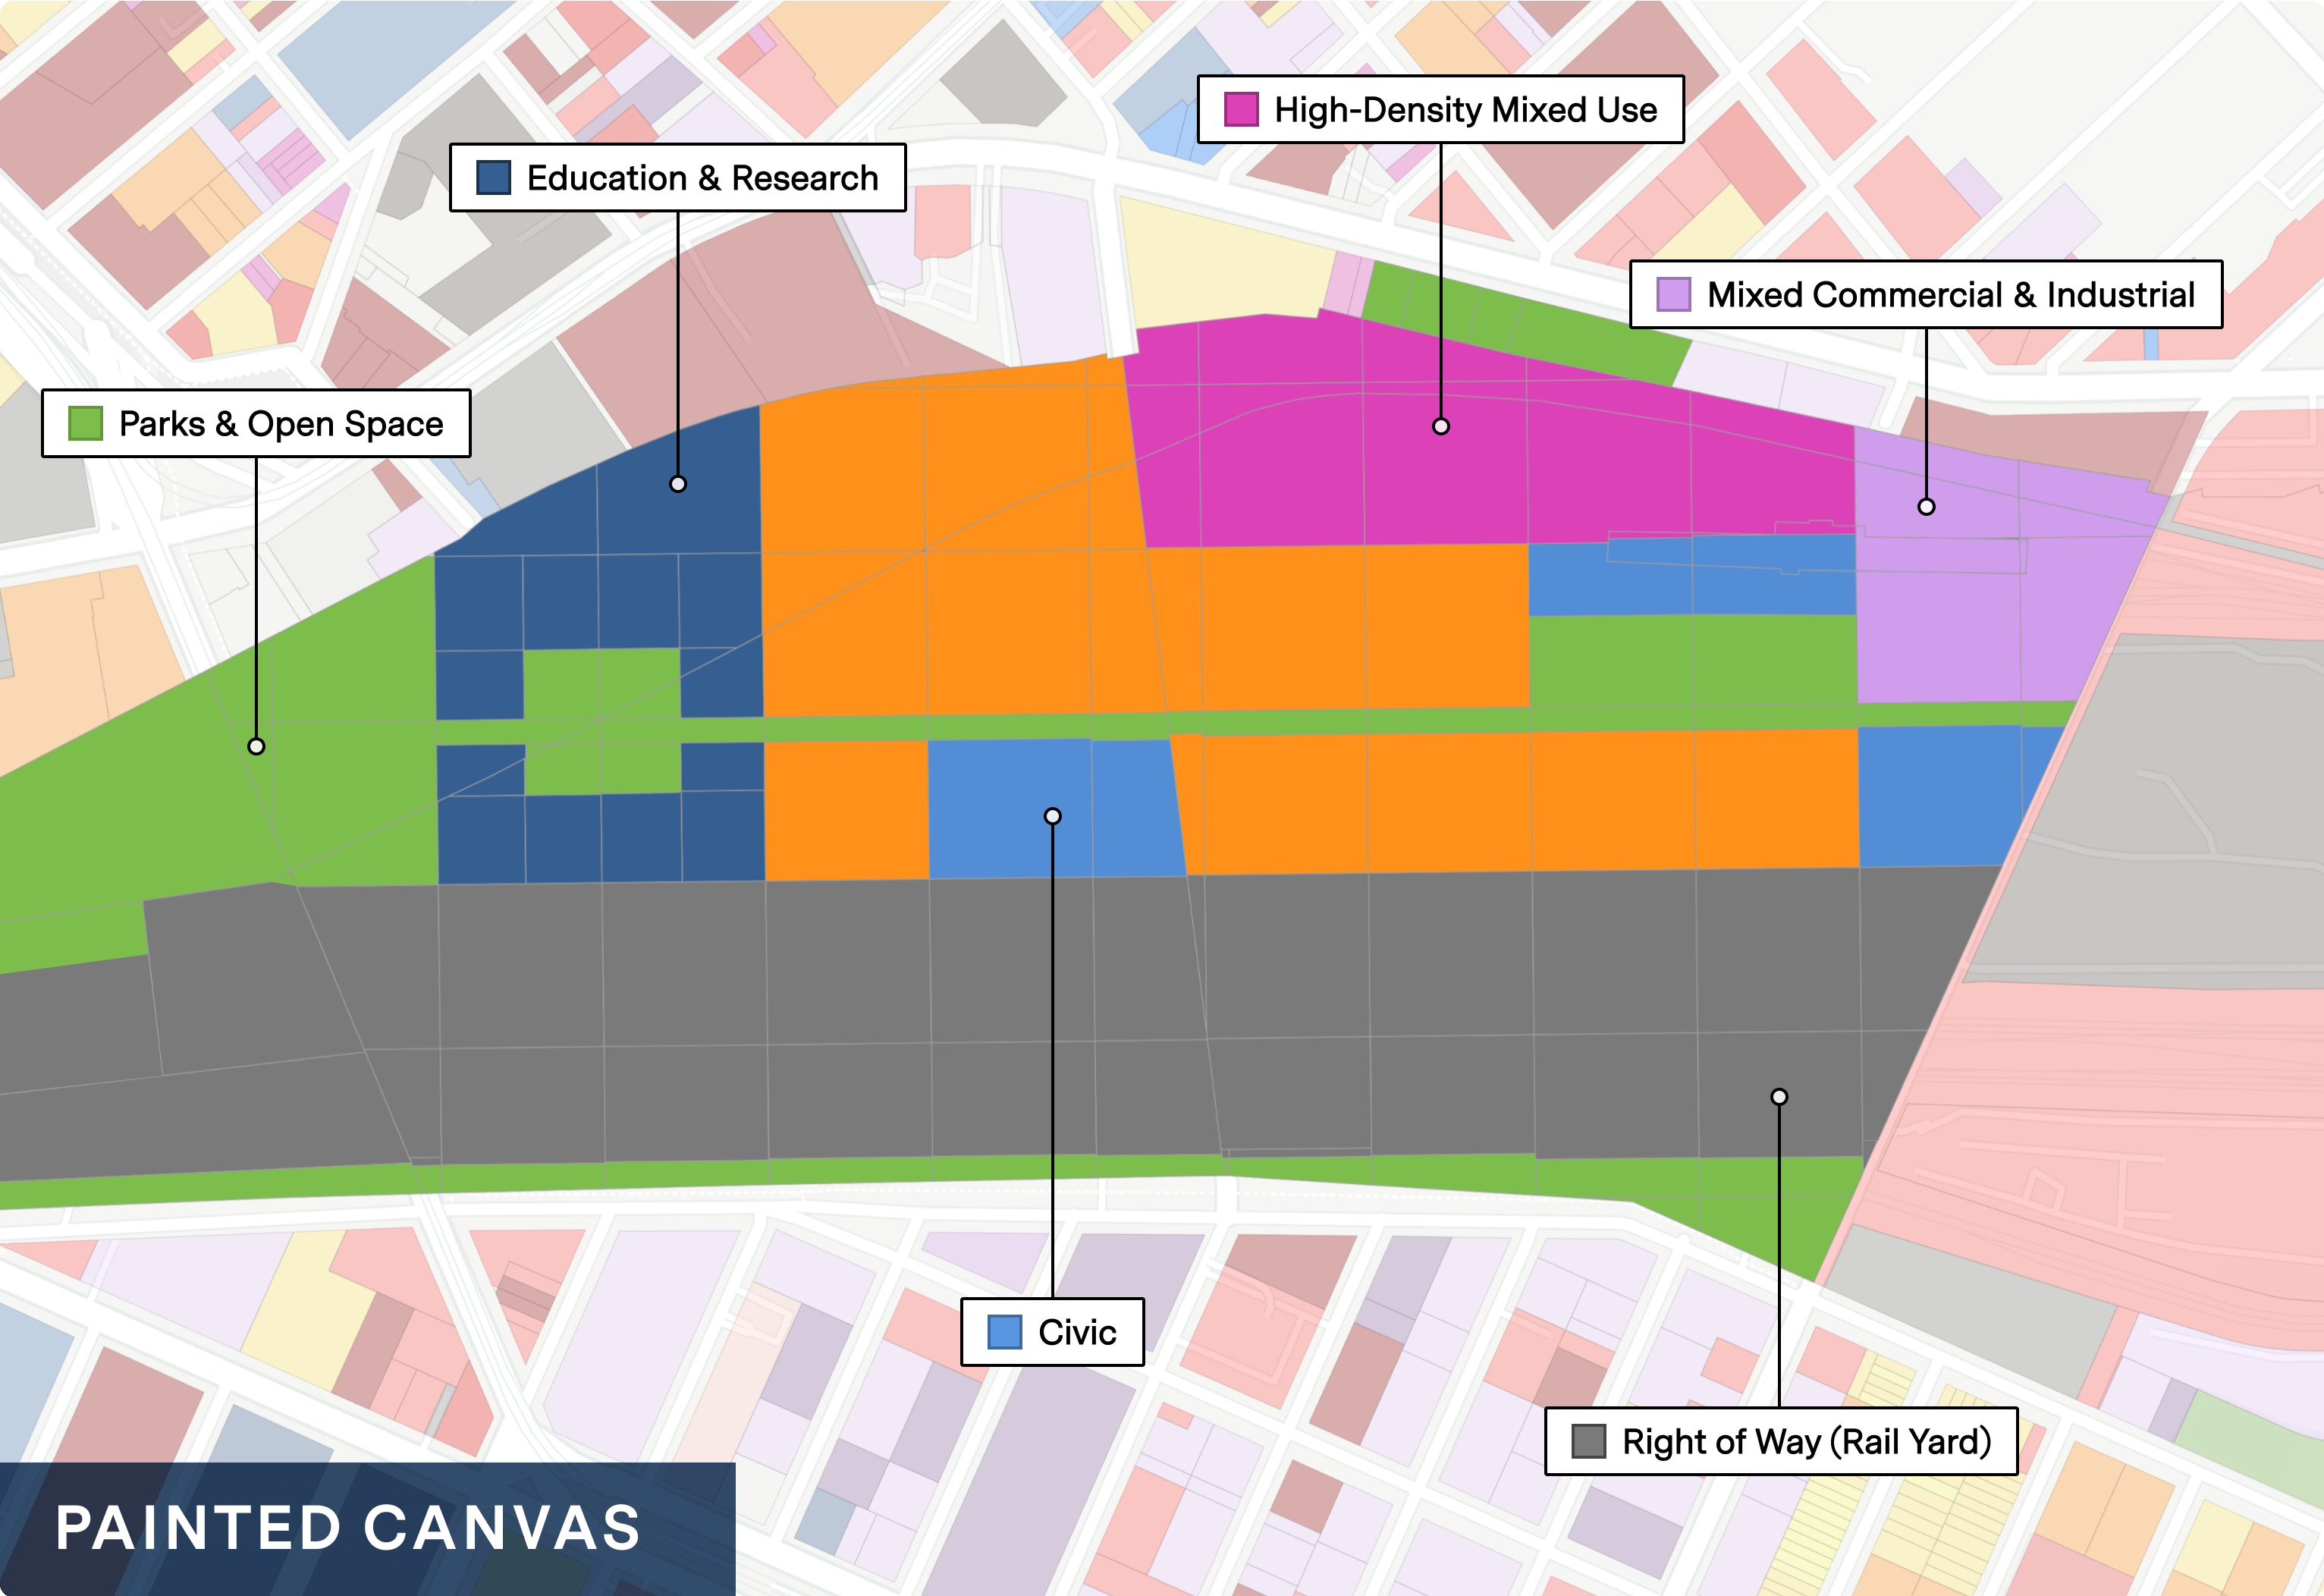
Gridded features as painted in a scenario