Advanced Joins
In the Analyst platform, Join to refine a dataset beyond using the data contained in the same layer. We'll cover three use cases of this tool using various project layers.
Join is similar to "Select Features by Location" or "Intersects" in other geospatial tools. This means that the Layer being used forms the basis of the data table, and the layer being joined provides a geospatial location finder.
Build Canvas-to-Reference Data Layers via Join
While working with parcel canvases, it's common to want to use some of the comparison metrics and data points from the county assessors office. The following steps will guide you through filtering out all Base Canvas Single Family Residences with total property values above $1 million.
Select the Base Canvas layer.
Add the Parcel Reference Data layer from the Layer Manager to your project.
Open the Filter menu and navigate to Join.
Select the Parcel Reference Data layer to join. This will light up and select all of the parcels in the base canvas.
Within the Join, select the Add Filter button.
The Parcel Reference Data will have a generalized land use name for each parcel. Select the land use name column. This will generate a list of various land use names.
Scroll down and select the checkbox for SFR. The blue outlines around each geometry will light up, and the "rows" in the Data Table update.
Scroll back to the top of the selected column, and use the arrow to close the selection list.
Select the Add filter to create and then select the Total Property Value column to bring into the selection.
Enter 1000000 as the minimum value, and the maximum value will automatically default to the largest value in the dataset. The Canvas blue outlines around each geometry will light up again and only select the parcels with a value over $1M.
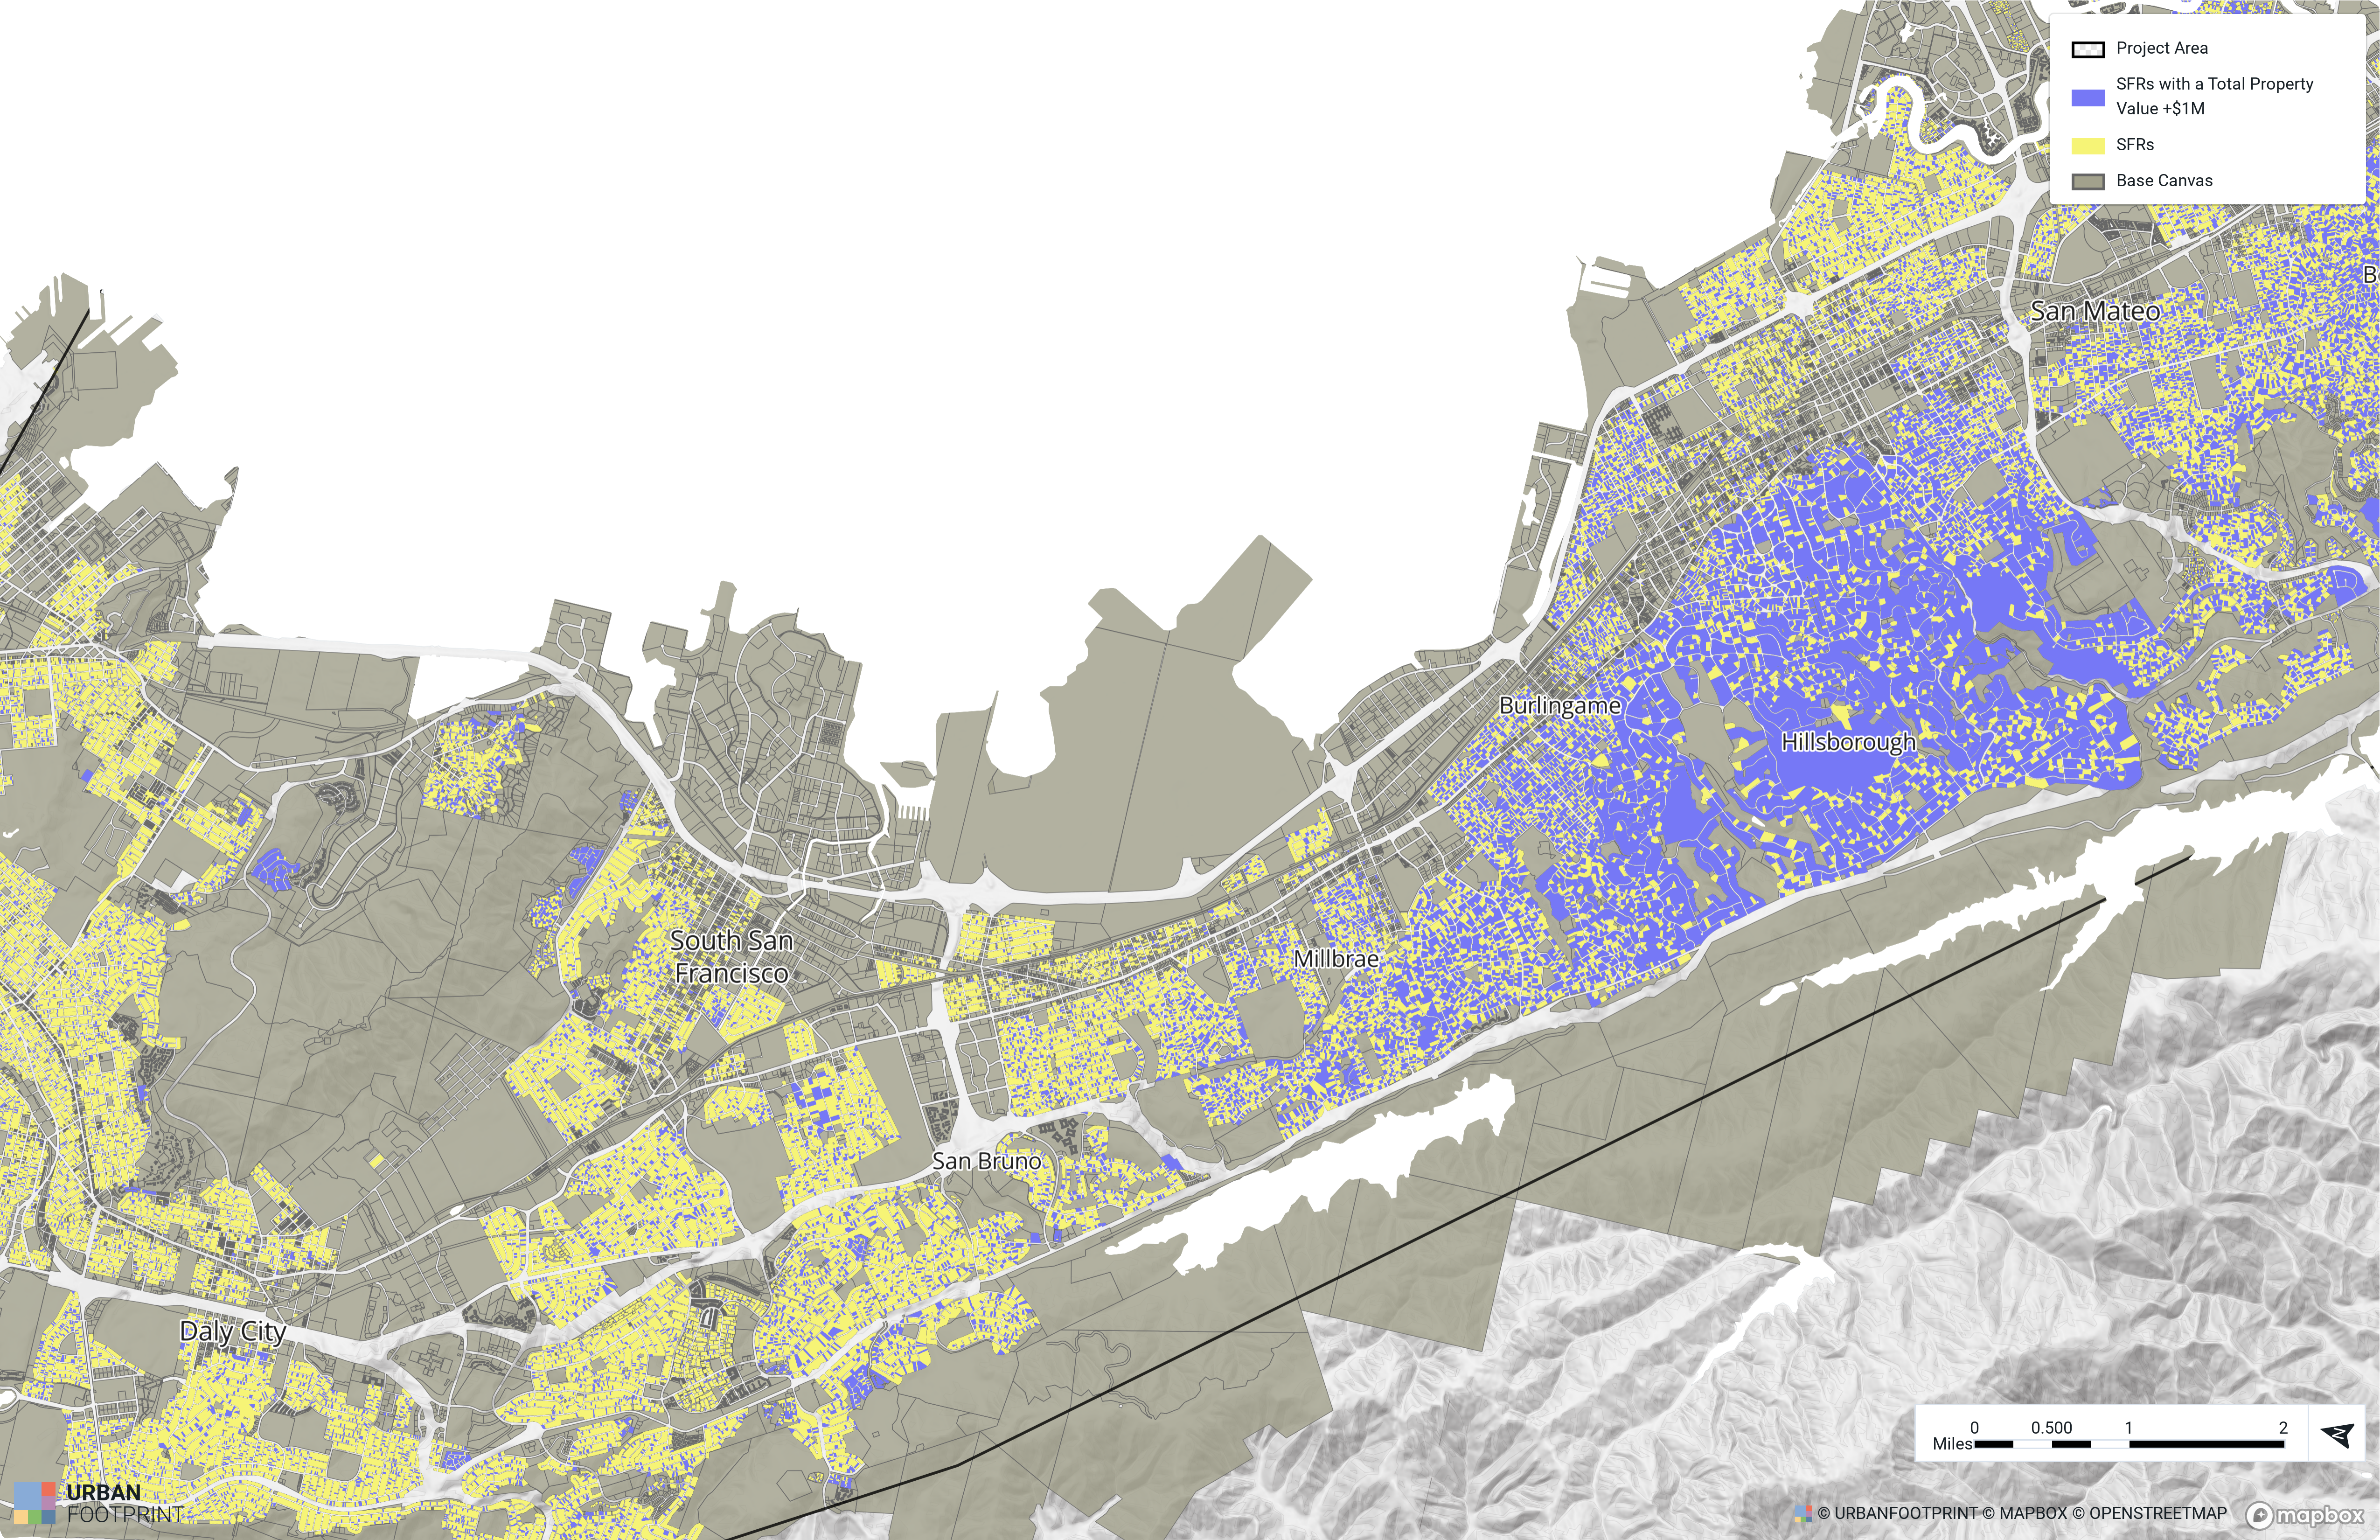 |
An example result of this workflow within San Mateo and San Francisco County
Intersects with a Buffer
One of the best uses of the Join is to select a specific area among the overall base canvas. The following steps will take you through the process of creating a sub-area directly around a Transit Line. This process also applies to Stops and other layers.
Select the Base Canvas layer.
Ensure you have added the Public Transit Lines layer. In this example, I'll be using Caltrain's Local Route. You can use map tools or filters to select only the specific line that matters to you.
Open the Filter menu.
Within the Join, Select the Lines layer.
Using the Buffer Icon
 in the top right corner of the join, select to buffer by a quarter of a mile (0.25). The system will take some time to calculate and update all of the selections along the buffer area.
Use Save As to filter out this selection from the rest of the Base Canvas.
Once saved, use the View button to turn the layer on.
Switch to the No Column (Single Symbol) column. This will create a simple line symbology for all of the parcels within a Quarter Mile of the CalTrain Line.
Note
If the system returns a result that says "Query Too Complex", Buffer the joined layer independently by selecting the layer and using the Buffer tab in the Layer Options.
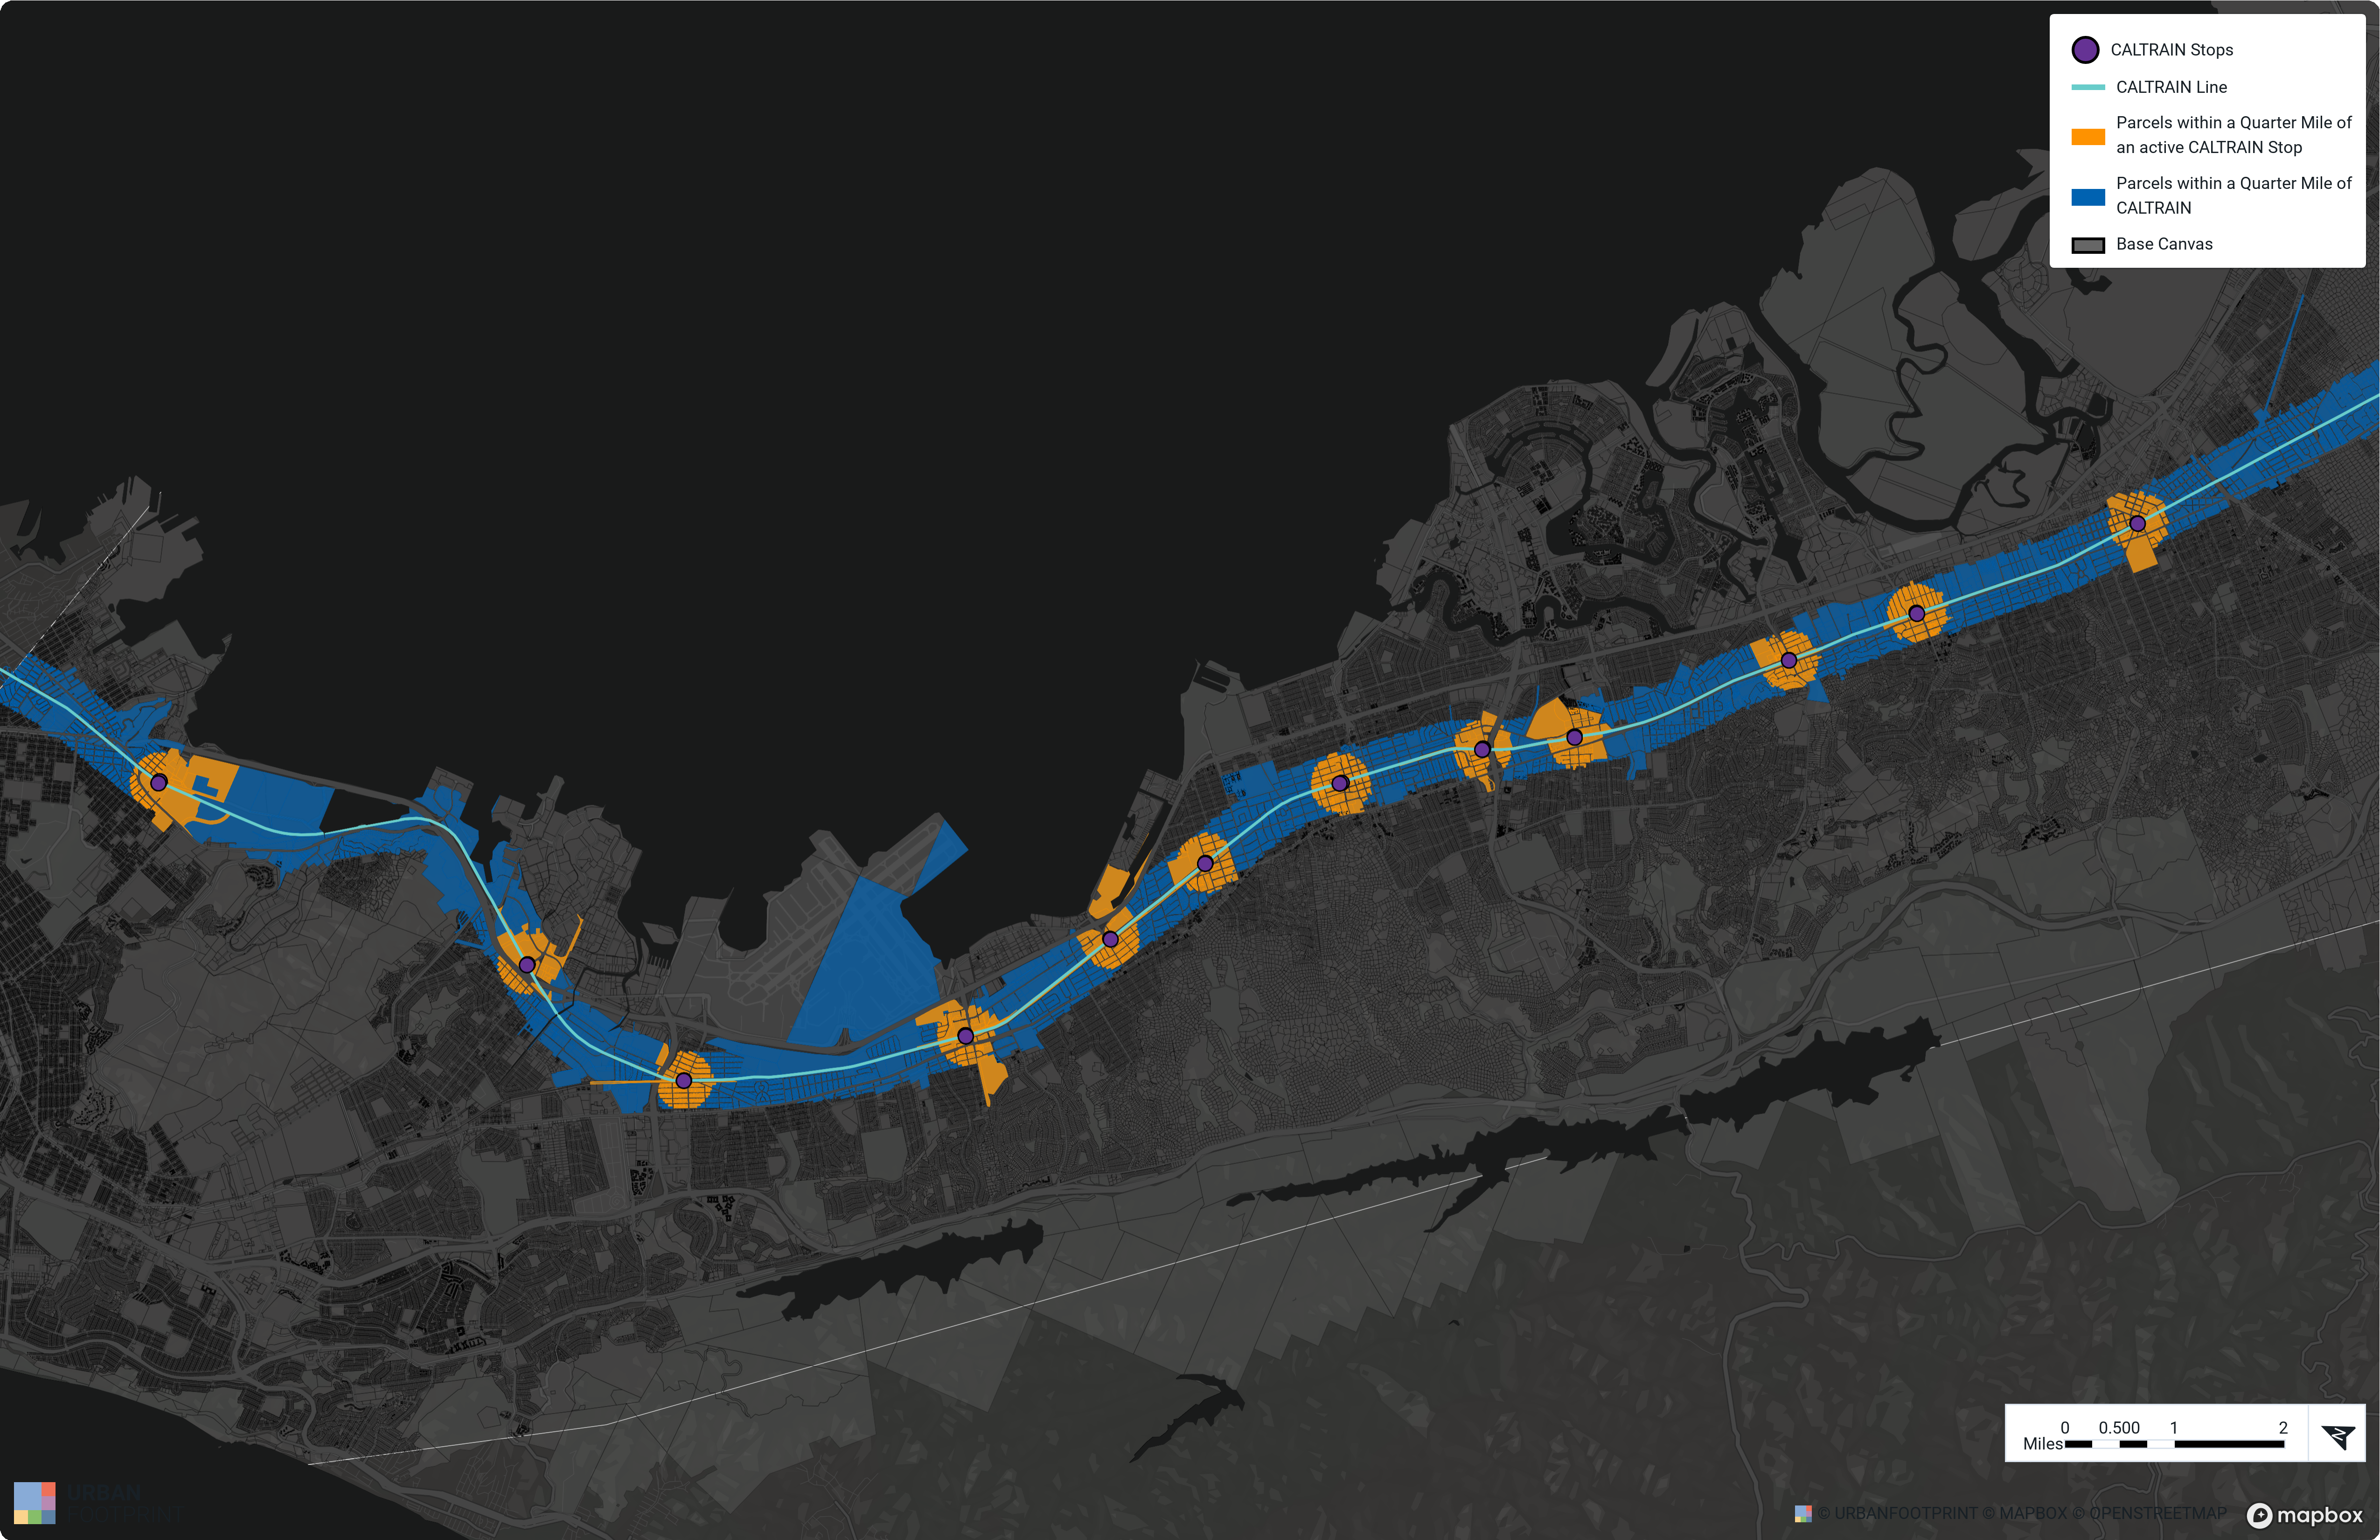 |
An example result of this workflow within San Mateo and San Francisco County.
Compare Selections using Intersects/Does Not Intersect
Using the Joins ability for intersects and does not intersect, you can gain immediate insight about a particular Zone or Area of your canvas. This workflow will take you through filtering down the data within and around a specific zip code.
Select the Base Canvas layer.
Ensure you have the Zip Code Tabulation Areas (ZCTAs) layer in your project. For this example, we've filtered the dataset down to only one specific zip code, 94066.
Open the Filter and navigate to Join.
Select the zip code area from the list of layers within Join layer. The selection will light up within the Join and the Data Table rows will update to only the parcels within.
Use Save As to filter this layer into its own reference layer.
Use the dropdown within the Join to select Does not intersect layer. This will update the filter to select all of the parcels that are beyond the intersection of the buffer.
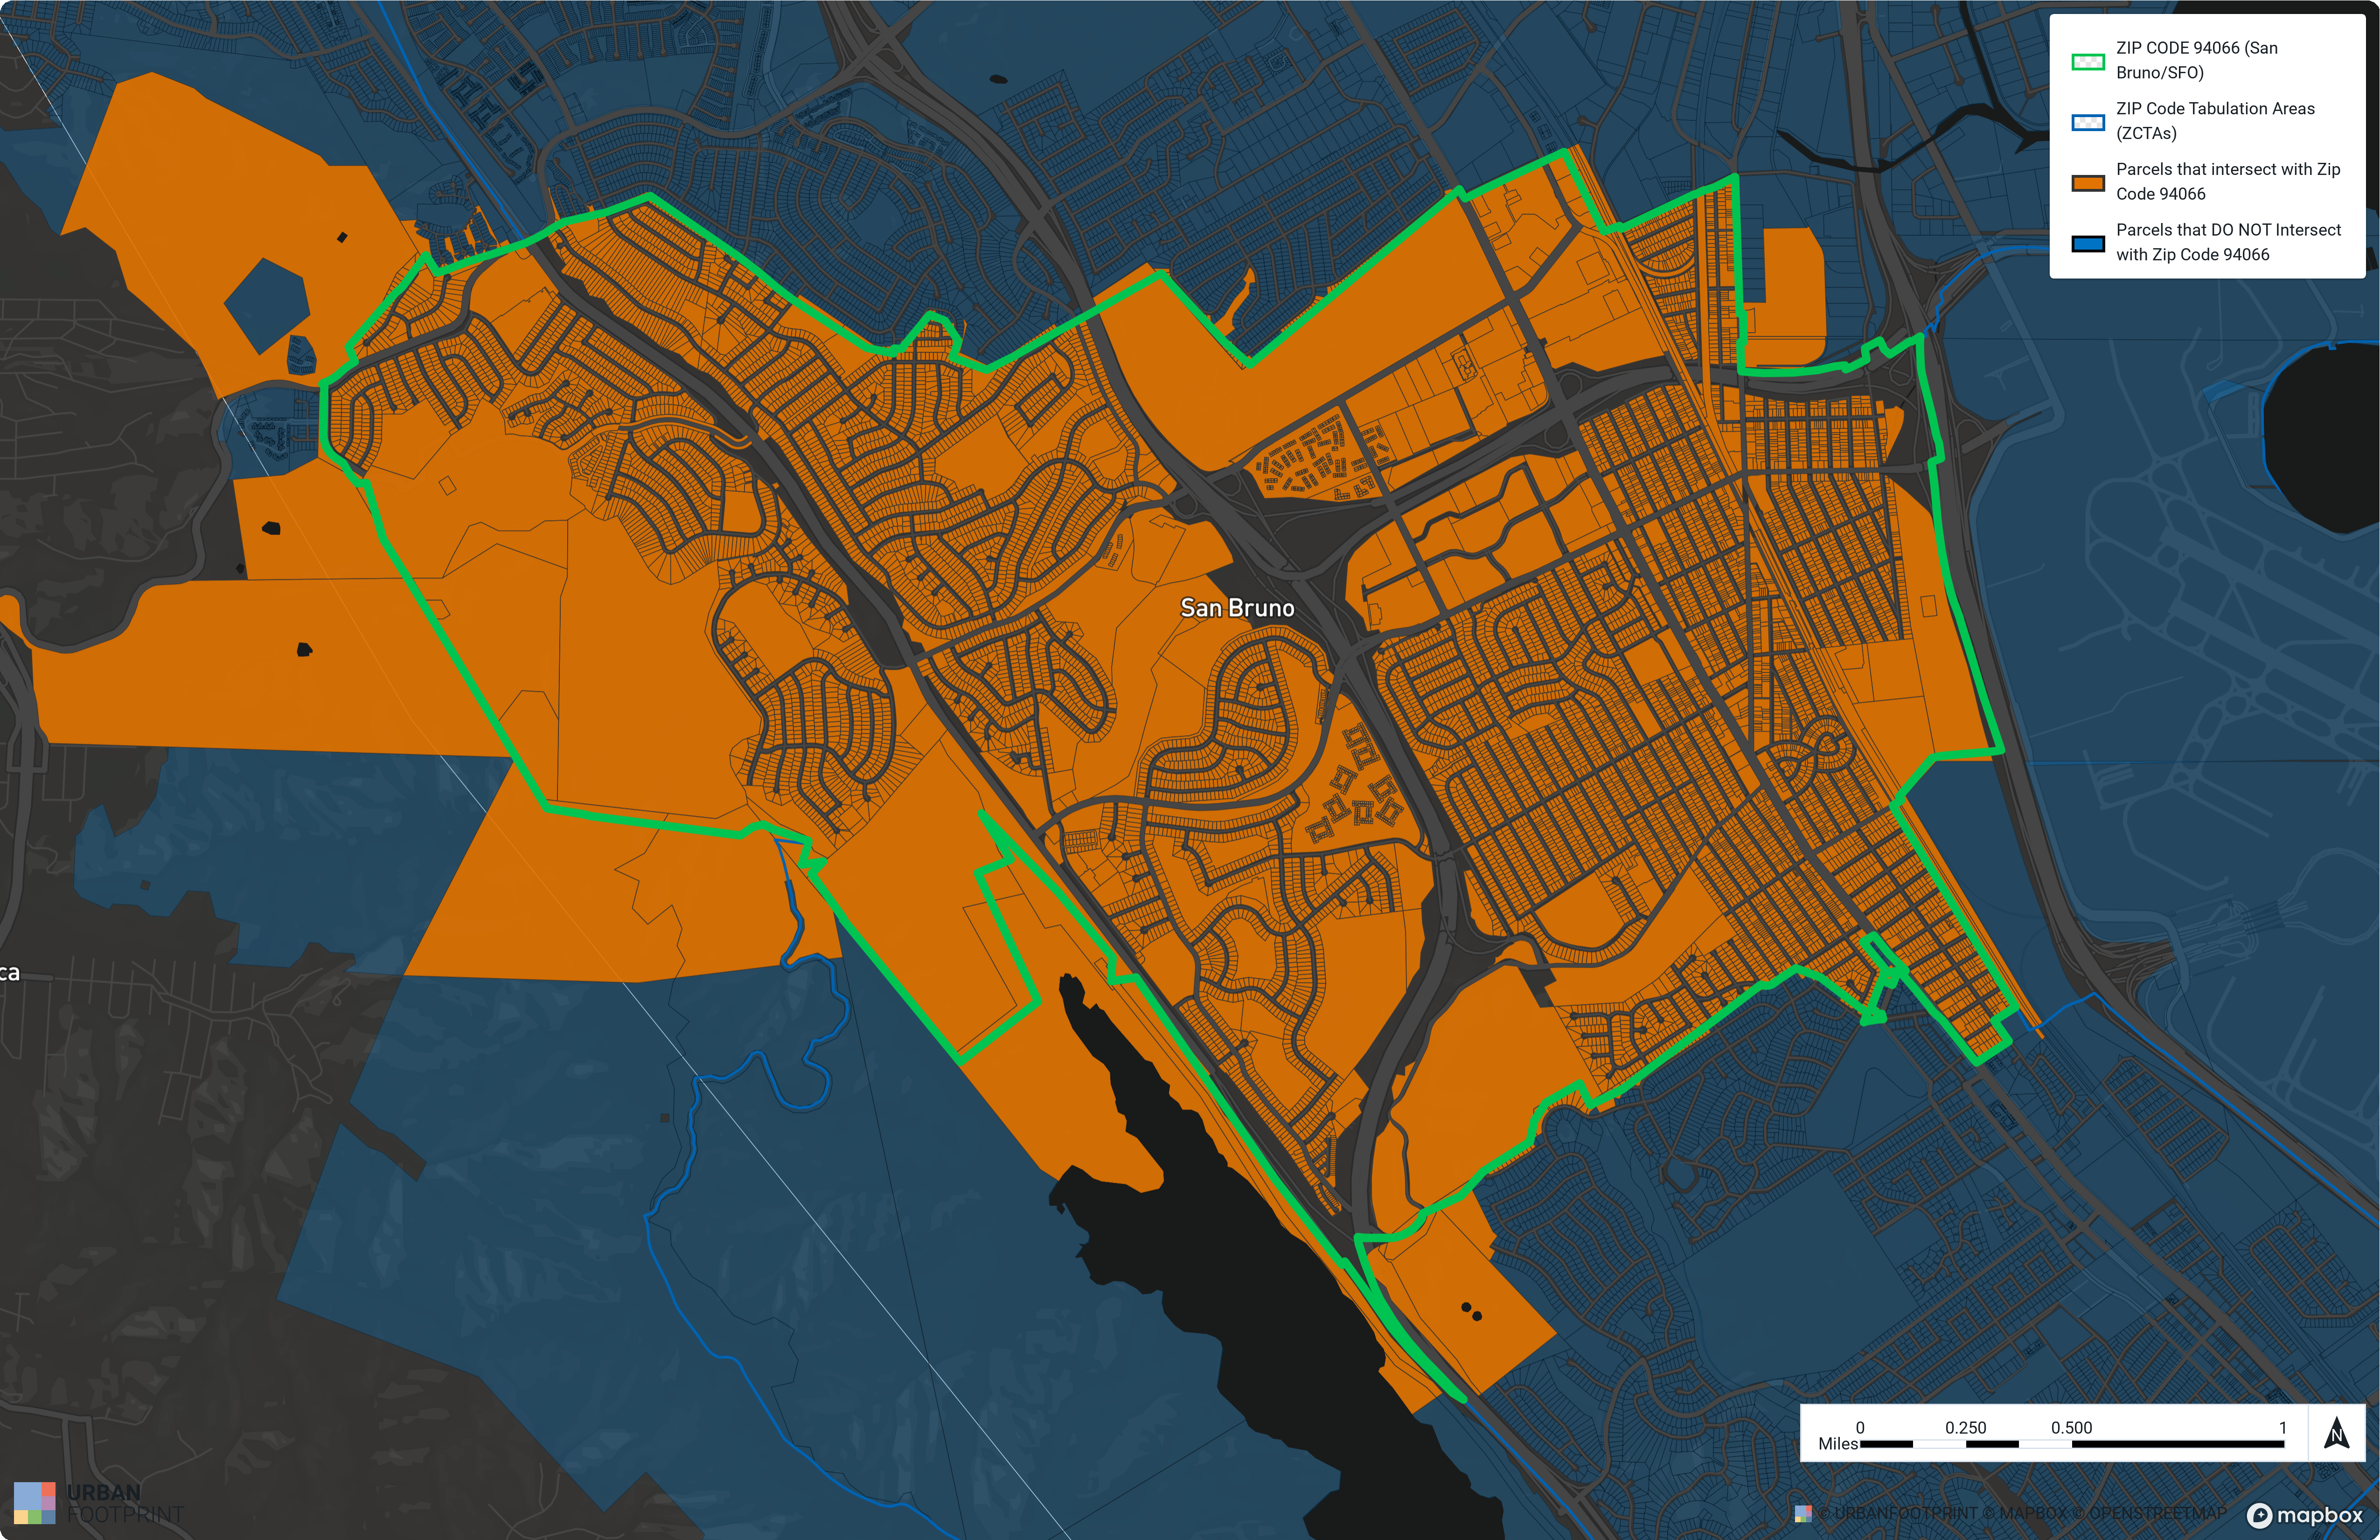 |
An example result of this workflow within San Mateo and San Francisco County