Work with the Layers Pane
All spatial data for a project are represented as layers, of which there are several types: the Base Canvas, scenario layers, reference data layers, filtered layers, and analysis layers. The layers' inclusion, visibility, and ordering are managed using the controls and features of the Layers pane.
Note that all layers that are added to a project, including those created as saved filter selections or as analysis outputs, become available to all users with access to the project. Layer settings are linked to individual users, including layer visibility, ordering, symbology, and active filters.
Layers Pane Controls
The Layers pane includes controls for adding layers to your project, adjusting their visibility and order on your map, and working with individual layers.
Upload Layer – The Upload Layer button
 at the top of the pane opens the dialog to upload your own data. See Upload Data Layers for details on uploading data to your project.
Add Layer – The + Add button at the top of the pane opens the Layer Manager to access reference data. See Use Reference Data for details on adding reference layers to your project.
Layer Details – The tab at the top right side of the Layers list opens or closes the Layer Details pane, which includes tabs to access controls for styling and filtering layers, viewing layer source information, editing the Base Canvas layer (if the Base Scenario is selected and the active layer is the Base Canvas), or building scenarios (if the active layer is a scenario layer).
Layers List – The Layers list gets populated as you add or upload layers to your project and run analyses. The list will initially contain layers for your project area and the Base Canvas. The different layer types—Base Canvas, scenario layers, reference data, uploaded data, filtered layers, and spatial analysis outputs—are denoted by icons to the left of the layer names.
Hover over layer entries to view individual layer controls. You can also click and drag layers to change their order in the map. See Arrange Layers for details.
Filter
 – Opens the Layer Filter Tab. See Filter and Join Data for details.
Show/Hide
 – Sets layer visibility. See Set Layer Visibility for details.
Layer Options > Remove Layer – If permitted for the layer type, removes the layer from the Layers list. Reference layers that exist in the Layer Manager are not deleted—they can be removed and subsequently re-added if needed. See Remove or Delete Layers for details.
Layer Options > Delete Layer – If permitted for the layer type, deletes the layer from your project. User-uploaded layers and layers that have been saved as filtered selections can be deleted. Once deleted they cannot be recovered. See Remove or Delete Layers for details.
Layer Options > Change Layer Name – After you've saved a layer and named it, you can rename it whenever you need to. See how to Change a Layer Name.
Layer Options > Show only painted geometries – Available for scenario canvases only; allows you to view only those features that have been painted.
Set Layer Visibility
Visible layers are denoted by darker layer name text. Turn layers on and off using the Show/Hide control , which appears as you hover over each layer.
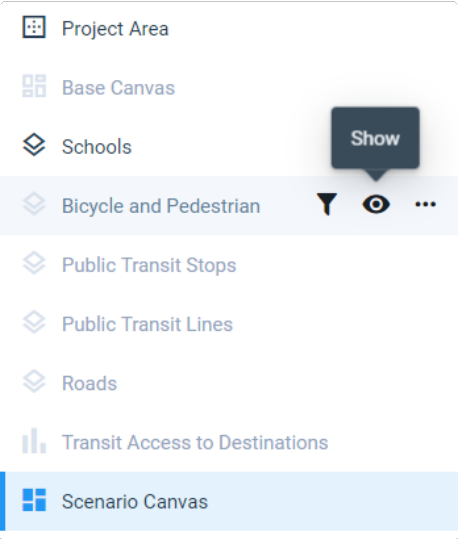 |
View of the Layers list
The map is redrawn when layers are shown or hidden. The same layer visibility settings are maintained across scenarios. Remember that all layer settings are linked to individual users, including visibility, ordering, symbology, and active filters.
Arrange Layers
The order of layers on the map is determined by their order in the Layers list. Layers higher in the list are displayed atop layers that are lower in the list.
To adjust layer ordering, click on a layer entry and drag it to the desired position in the Layers list.
 |
Reordering layers
The map is redrawn when layers are reordered. The same layer order is maintained across scenarios. Remember that all layer settings are linked to individual users, including visibility, ordering, symbology, and active filters.
Remove or Delete Layers
Whether you can remove or delete a layer depends on its type. Reference data layers are "removed" rather than deleted since they can be added back in from the Layer Manager. Deletion applies to user-uploaded layers, filtered layers, and buffered layers. Once deleted, layers cannot be recovered.
Layer types generated by Analyst—the Project Area, Context Area, the Base Canvas, scenario layers, and analysis output layers—cannot be removed or deleted.
To remove a layer:
Hover over a layer entry in the Layers list and click the Open menu button
 to open the Layer Options menu.
Select Remove layer or Delete. The layer will be removed if applicable. If deletion applies to the layer type, a confirmation dialog will appear. If you confirm, your layer will be deleted.
Change a Layer Name
You can change the name of a saved layer, which you might want to do if you've made a typo in the name or need to update it for any other reason.
Roll over a layer entry in the Layers list and click the Open menu button
to open the Layer Options menu.Select Change Layer Name.
Enter the new name and click OK. You should see the renamed layer in the Layers list and in the Layers pane.