Trim Layer Extent
When working with a project layer in its original form, you may need to trim unnecessary geographies from the layer extent area. You might trim a layer if it extends outside a relevant boundary (for example, a jurisdiction boundary or service area), either for visualization or data summary purposes. One example of when to trim a layer is if you have parcels that extend outside the boundary you're interested in visualizing or analyzing. There are a few different ways to trim once you've decided which geographies aren't needed in your project extent:
Filter by geographic attribute – You should always try this method first when you need to trim your layer extent. Check to see if the data table has an available geographic attribute, such as a county name, relevant to the scope and geographic features you're trimming from your layer. For example, if you select a county name as your geographic attribute, only geographies linked to your chosen county name will be selected on the map.
Trim using a selection tool – Use this method if an applicable geographic attribute is not available in the data table. You can use the point selection, polygon selection, or box selection tools first to select the entire area you'd like to trim from and then deselect any overlapping or extra geographies from the project's scope.
Create a negative buffer – Use this method if an applicable geographic attribute is unavailable in the data table and your area is too large or complex to trim quickly with a selection tool.
Filter by Geographic Attribute
If you need to trim geographies outside of your project focus, the first method to try is to filter by a geographic identifier if one applies to your project. You can select these geographic attributes, such as county name, zip code, or tract GEOID in the list of categorical filters in the Layer Details pane.
Select the layer you would like to trim. For example, this layer could be the Project Area layer.
Reference the layer's Data Table or its schema to see whether the geographic attribute you are looking for exists.
Click Filter > Add Filter drop-down in the Layer Details pane to view the list of categorical filters.
Select the check box next to the geographic identifier you'd like to use from the drop-down and click Save as.
Trim using a Selection Tool
If the layer extent is particularly irregular or has only a few geographies you'd like to exclude, it may be best to use either the polygon or box selection tool and then manually deselect overlapping or extra geographies from its boundaries.
To deselect any excess geographies from the boundary using the point selection tool:
Choose either the box or polygon selection tool.
Click and drag to highlight the entire focus area, including the overlapping geographies you want to deselect.
Click the
 point selection tool and hold down Shift as you select the geographies you want to remove. This will deselect any highlighted geographies you don't want to include in the project.
Create a Negative Buffer
Use a negative buffer to trim a layer to exclude overlapping or extraneous geographies. You can use the negative buffer method to trim the layer extent if the area is irregular but too large to trim manually with a selection tool. For example, you may want to trim your project parcels to show only those that fall within the Murray School District. Since the school district is an irregular shape, you can use a negative buffer to trim extraneous geographies from its boundary.
Click the Show/Hide icon
 to hide all the layers in the Layers list except the layer you want to trim.
For example, Murray School District boundary shows an example of a project created with Salt Lake County as the project area, with the Murray School District added as a separate layer. The Murray School District is the layer we want to trim using a negative buffer, since it is irregular and includes unnecessary geographies.
Figure 1. Murray School District boundary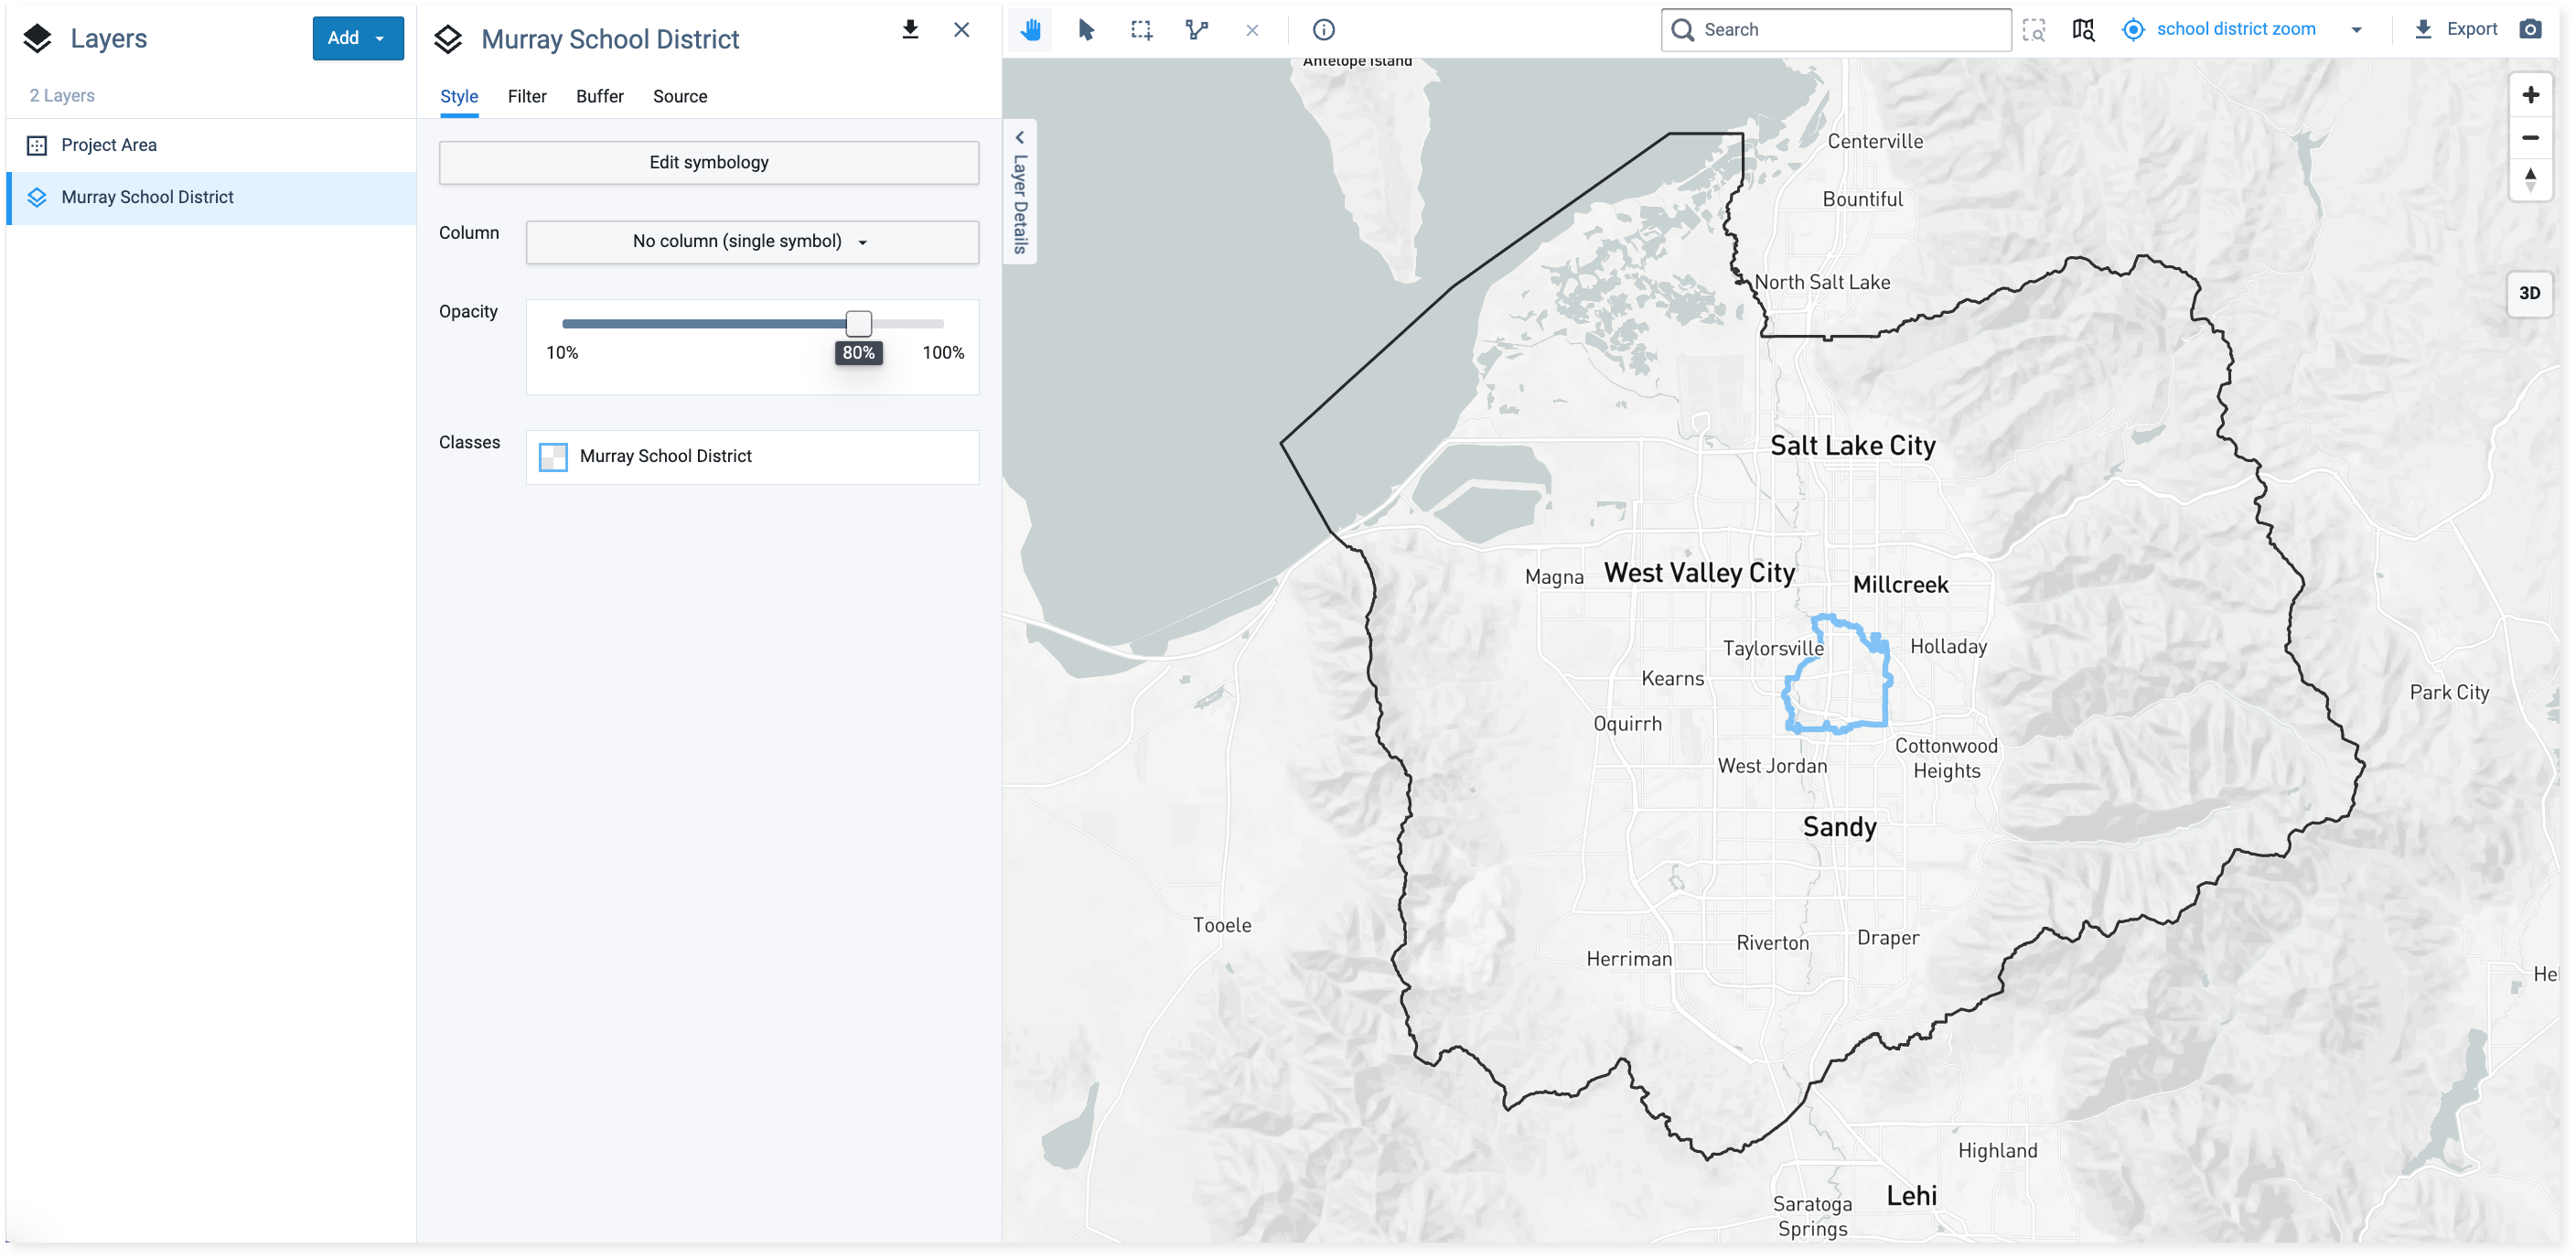
Salt Lake County project area with Murray School District outlined in blue
Click on the layer you want to trim in the Layers list to activate the layer and its Layer Details pane.
If following the Murray School District example, select the Murray School District layer.
Click Buffer in the pane and enter a negative value in the field in miles, kilometers, feet, or meters. We recommend using -50 ft. as a starting distance for a county buffer, but try again with a value closer to -100 ft. if the negative buffer isn't large enough. Start with setting a -500 ft. buffer distance for larger-scale projects.
If following the example, enter -80 ft. into the Distance field like in Negative Buffer Distance of -80 ft..
Figure 2. Negative Buffer Distance of -80 ft.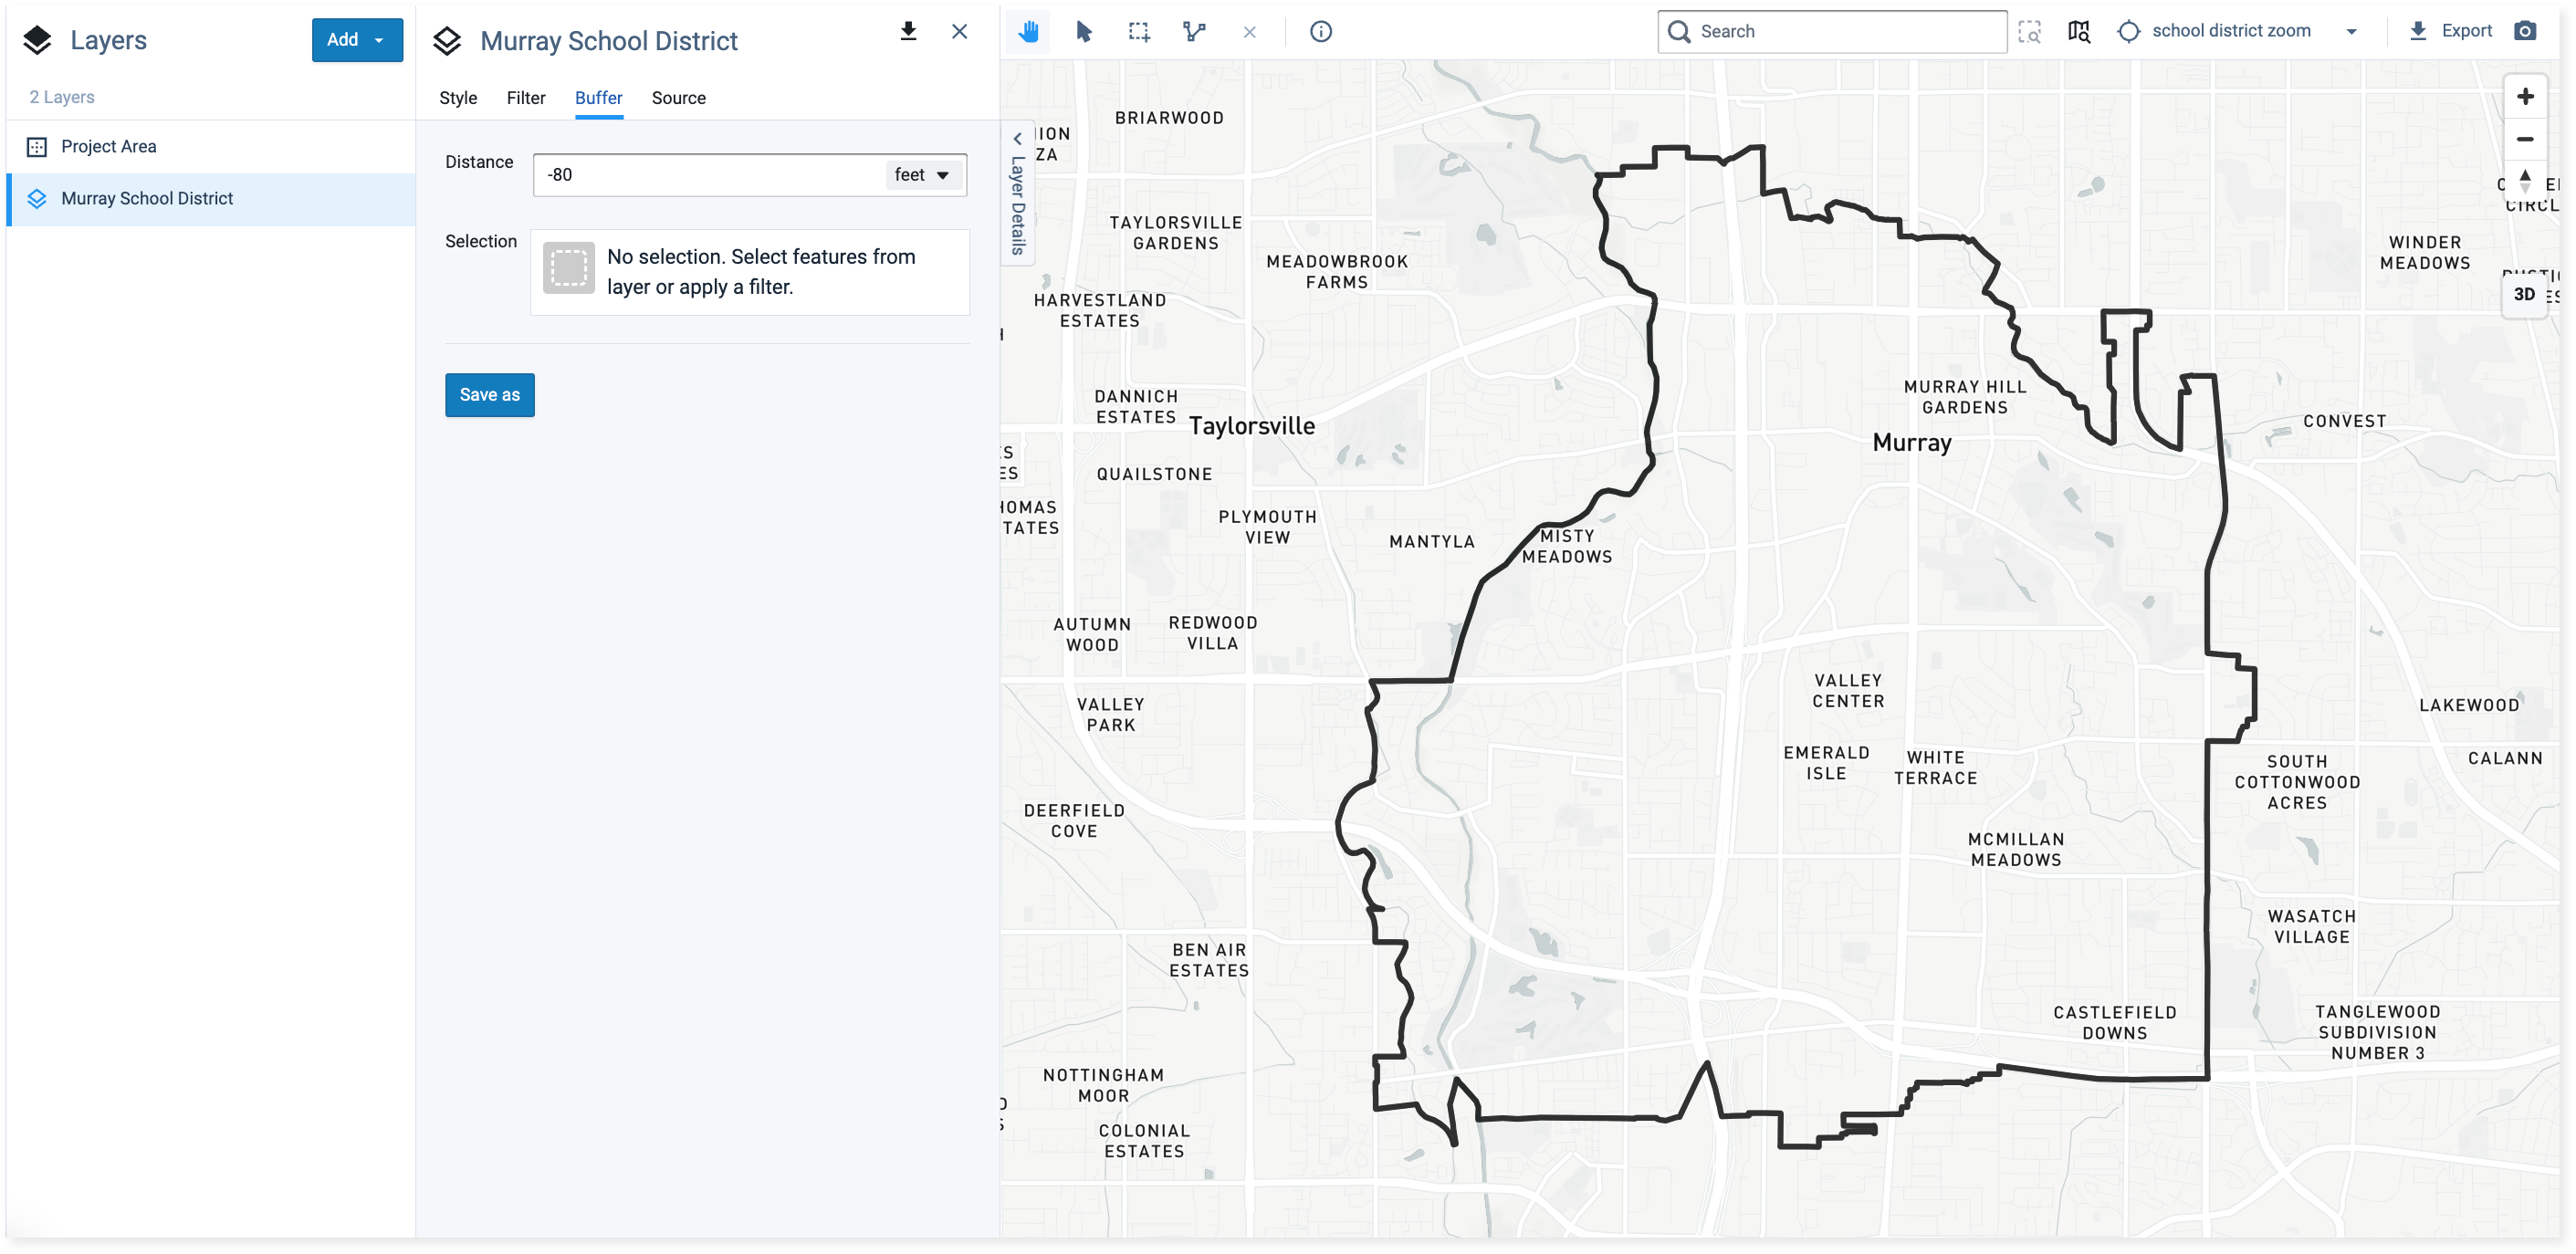
Zoomed-in view of the Murray School District with -80 ft. entered into the Distance field
Click Save as to save your buffered selection as a layer.
Enter a name and description for the new layer and click Ok.
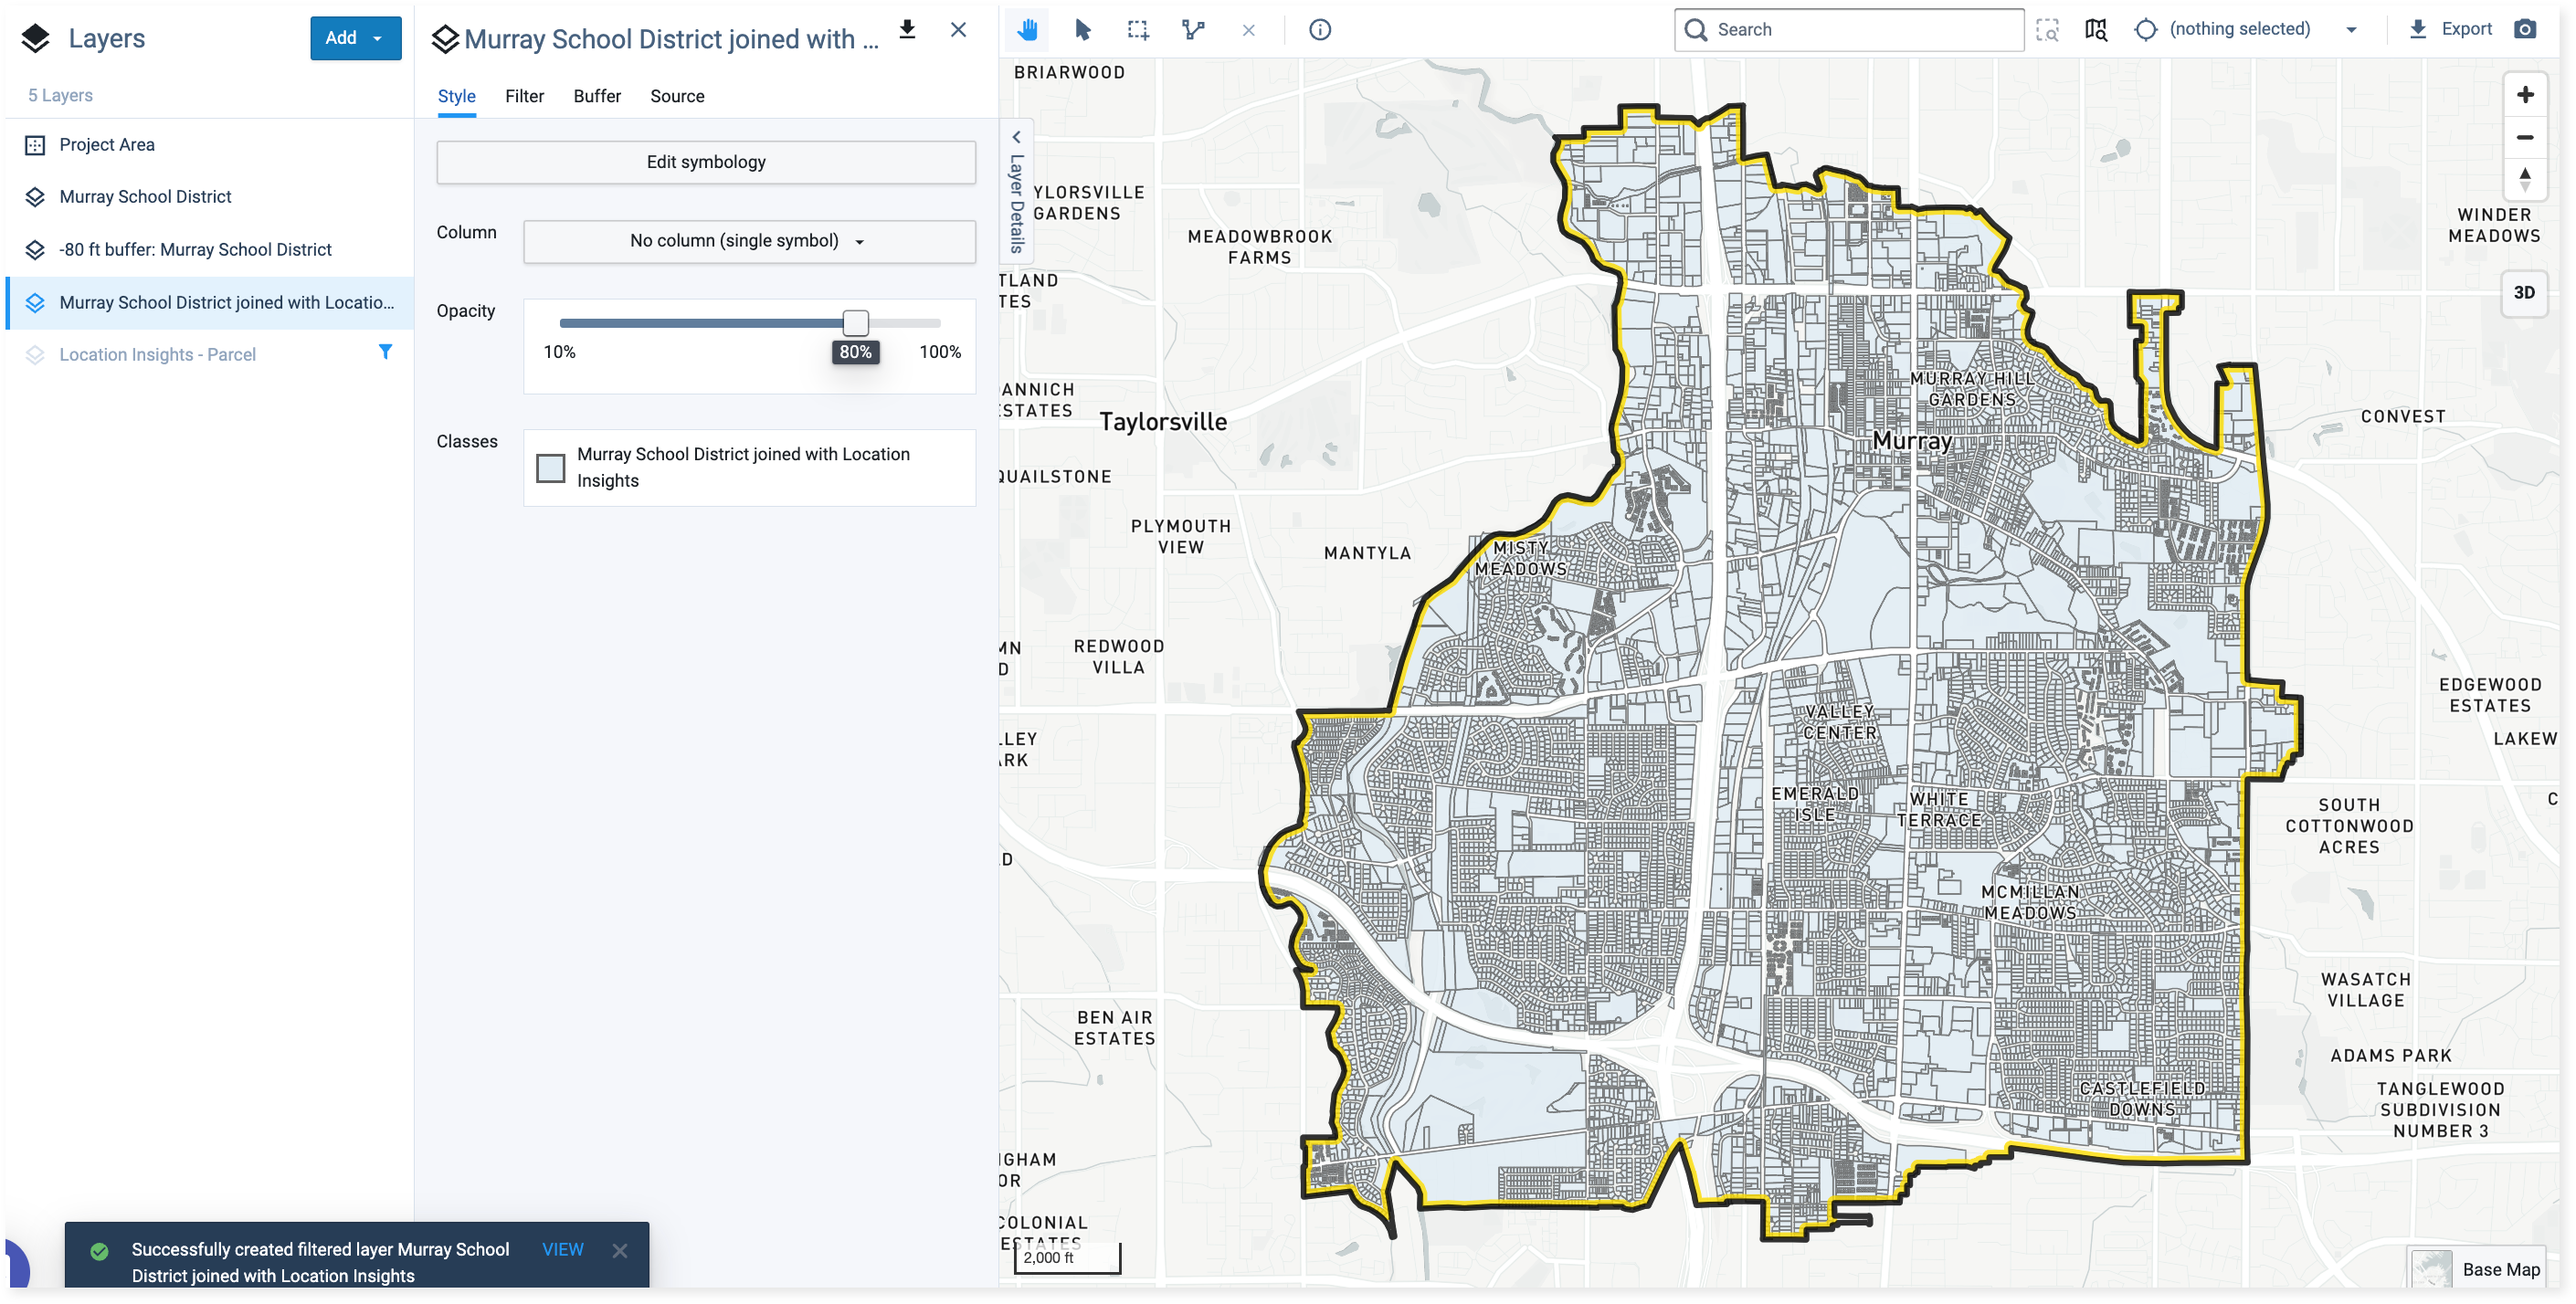
For example, name the new layer "-80 ft. buffer: Murray School District" and click Ok.
Figure 3. Visible -80 ft. Negative Buffer Layer
View of the negative buffer (yellow outline) after adjusted symbology and Murray School District boundary (black outline)
To trim overlapping or extraneous geometries from the layer extent, you can join a layer with a negative buffer.
Join a Layer with a Negative Buffer
Join a layer to your negative buffer to trim it and remove extraneous geographies from the layer extent. For example, if you created a negative buffer to trim an irregularly shaped project such as the Murray School District in School District with -80 ft. Negative Buffer, you can join it to the Location Insights - Parcel layer or a different layer that needs to be trimmed. You will be able to see which parcels or geographies are selected by the join. These parcels will be retained after the join is complete. If you find any remaining extraneous or overlapping parcels after the join, you can use the point selector tool to remove them.
View of negative buffer (yellow) and School District boundary (black)
Select the layer you'd like to join with the negative buffer. This is the input layer you'd like to trim, to which you will apply the negative buffer to get an output layer.
For example, add the Location Insights - Parcel layer to your project. Select Add > Add pre-defined layers to search for the layer in the Layer Manager to add it. Then, select it from the Layers list.
Click Filter in the primary layer's Layer Details pane.
If you're following the example, click Filter in the Layer Details pane of the Location Insights - Parcels layer.
Click Join layer and select the negatively buffered layer you created from the search list options. The project will now contain only the features that fall within or intersect with the negatively buffered area.
If you're following the example, select the layer you named "-80 ft. buffer: Murray School District" from the search list to join it to the Location Insights - Parcel layer.

View of Join selection applied to the input layer (Location Insights - Parcel layer)
Wait for the results to load and repeat the process using a larger negative buffer distance if the buffer includes too many extraneous parcels and a smaller distance if it doesn't include all the necessary parcels. Click Save as to save the negatively buffered area as a new layer.
The output layer is created by joining the negatively buffered School District to the Location Insights- Parcel layer